
Craig Pindell, Fine Art Photographer
All work copyright Craig Pindell, 2025
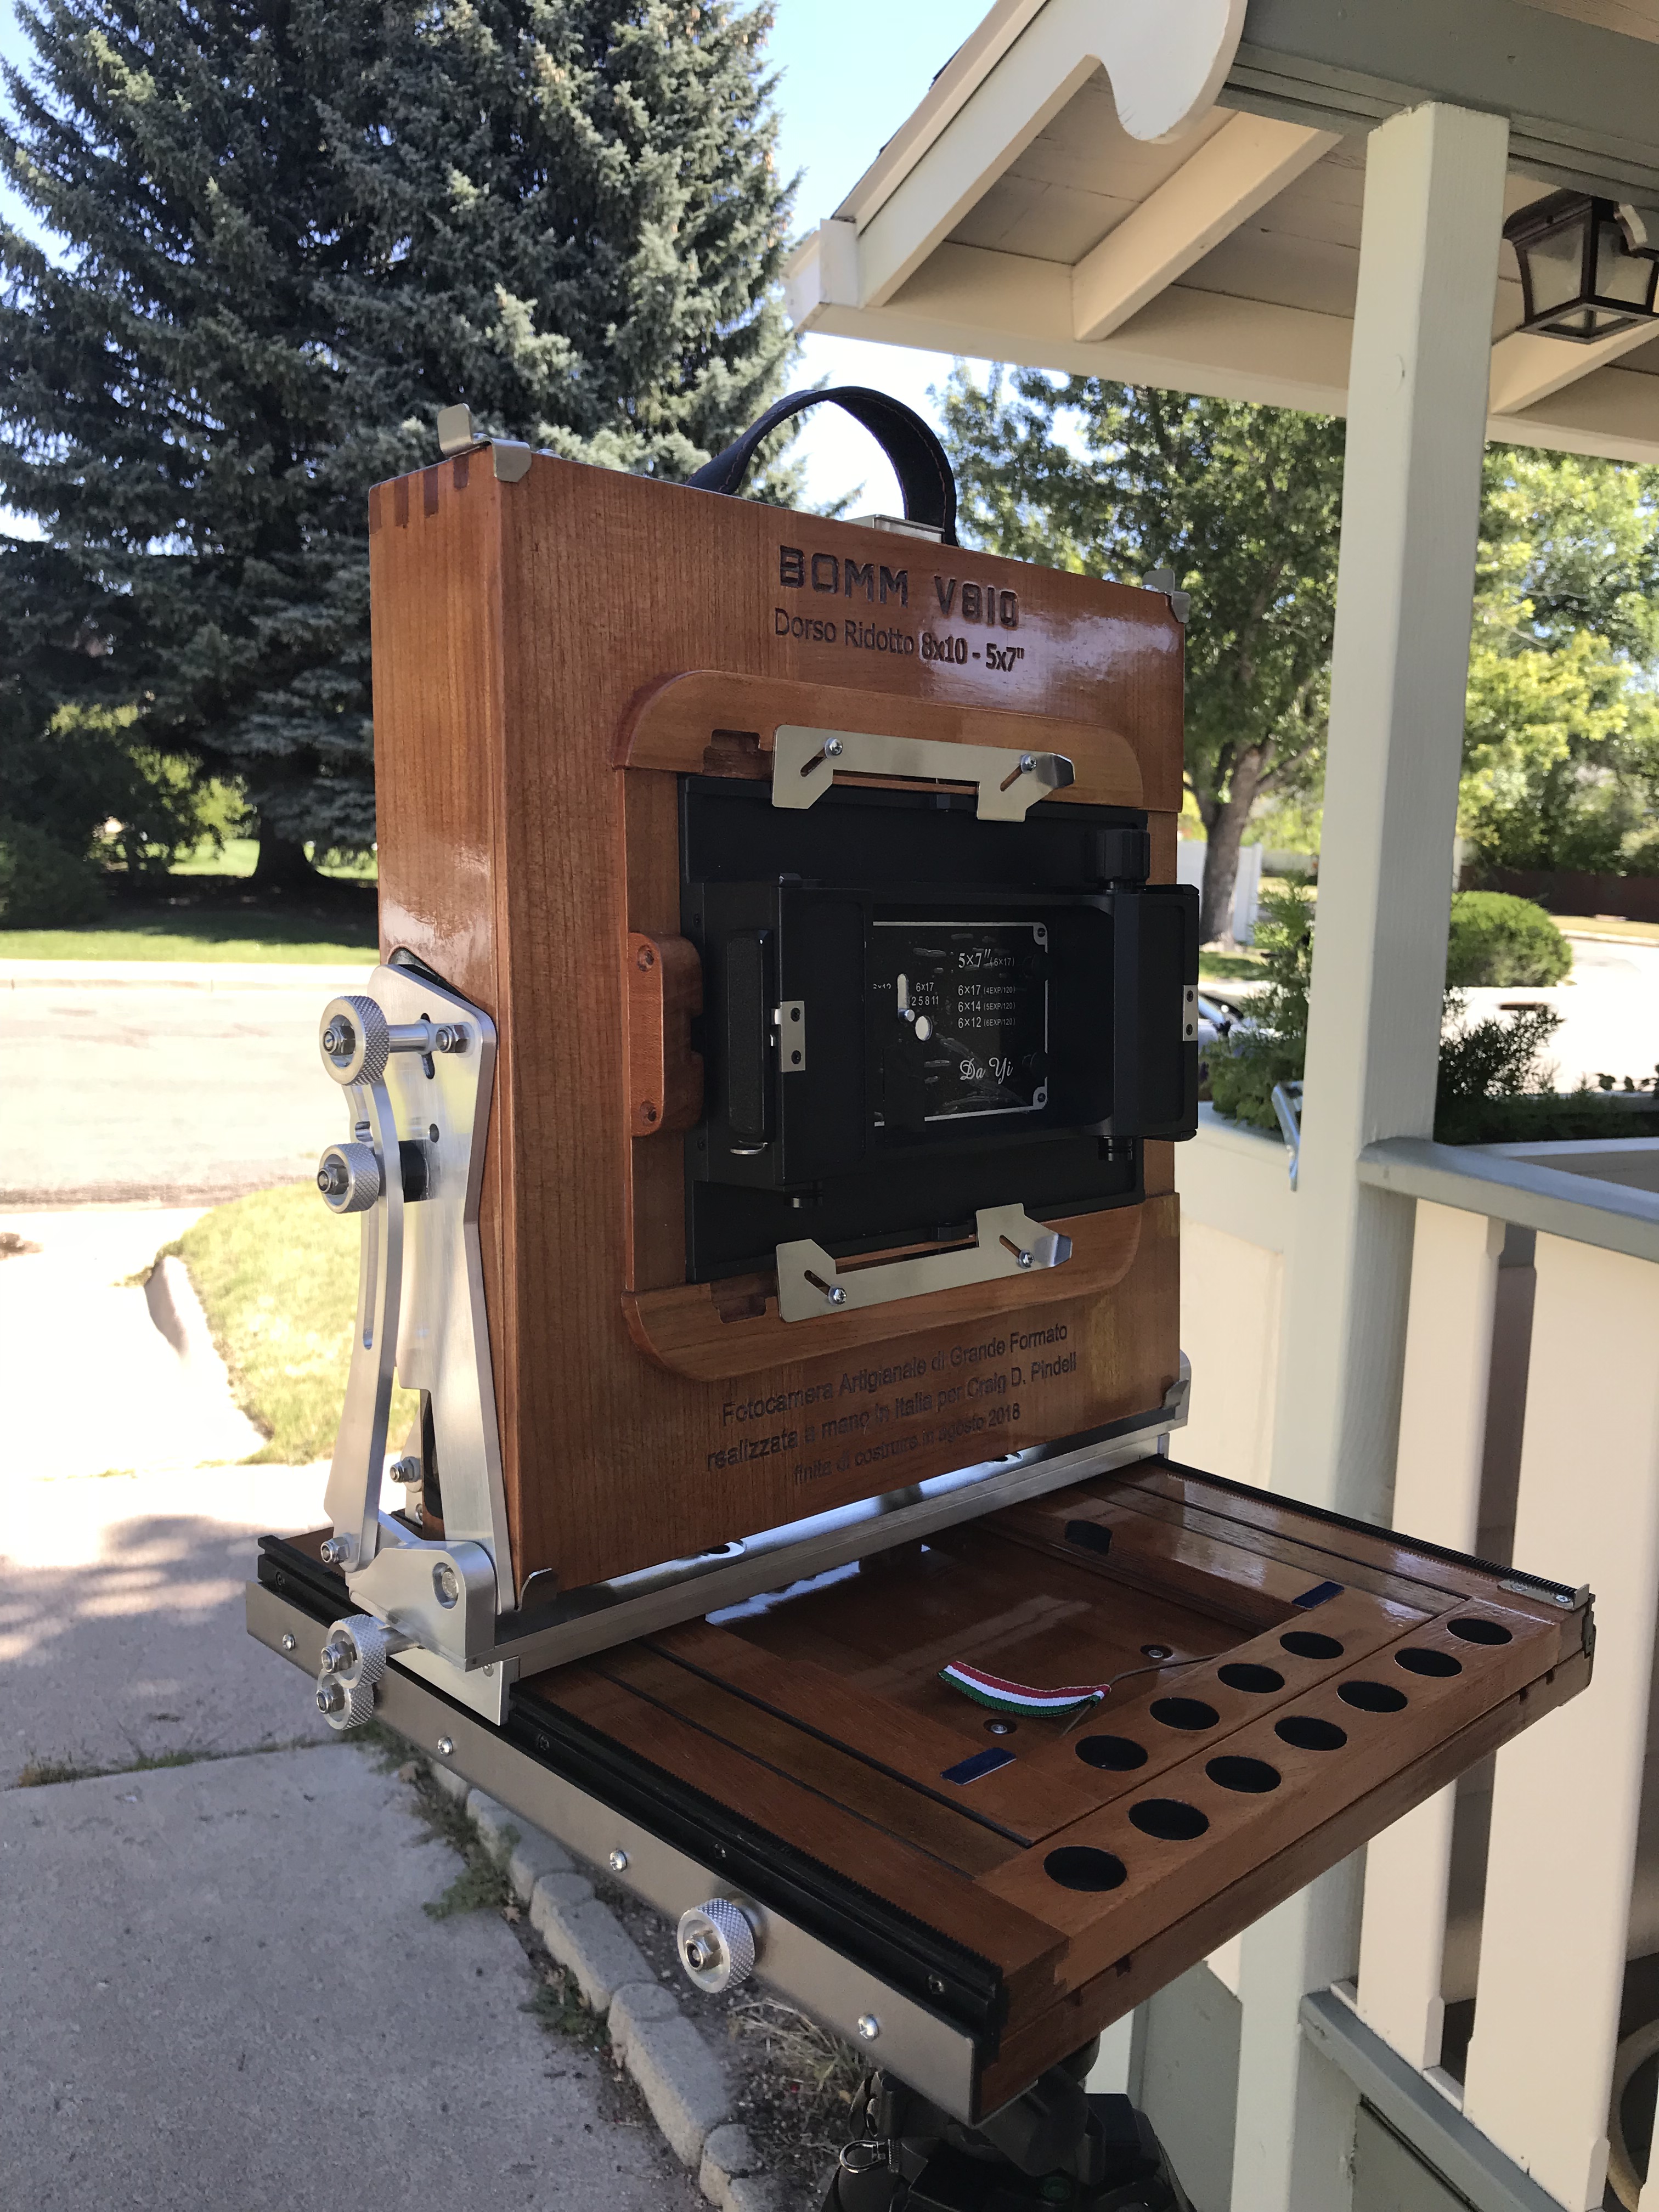
The Bomm Camera V810 #12
On September 12, 2018 I took possession of the most beautiful camera I have ever seen. The custom made 8x10 format field camera, designed and built by Bomm Cameras (bommcameras.com), of San Cesareo, Italy. Max, at Bomm, and I had many email discussions before I decided to purchase the Bomm. I knew the features I wanted on the camera, and Max agreed to try to incorporate everything he could into the design. The end product actually works better than it looks, and it is stunning!
Discovering
BOMM
The 8×10 Kodak Master View camera I have been using for the previous 13
years was very functional, sturdy, not too heavy and over the years, has
never given me any problems. It was a vast improvement over the Burke
and James 8×10 I had used prior to it, but there were still a few
improvements that I felt were needed.
I gave some thought to trying to modify the Kodak, but quickly rejected that idea, deciding that there must be a camera with everything I wanted being made by someone, but at the time I didn’t actually make a conscious effort to shop for a new one.
I seized the opportunity (on the proviso that they could provide all of
the features I wanted). During my early conversations with Max, I told him I would not be
interested in purchasing a camera unless it provided an improvement in
functionality over my Kodak. The beauty of the camera was totally
secondary for me.
Front standard
Rise and fall should utilize geared movement for precise control, and tilt should remain constant when using rise and fall.
Front tilt must be geared for precise control.
Swing and shift could be sacrificed if the front standard would be more solid without these features.
I wanted to use Linhof lens boards on this camera. The
standard 4x5 lens boards, not the larger 5x7 boards.
Rear standard
Rear tilt and swing must be on centerline axis.
Compatibility with 8x10 and 5x7 film backs - the 5x7 specifically must have a Graflok capability for my 6x17 DaYi panoramic 120 roll film back.
Bed and bellows
I wanted to be able to use my Schneider 72mm XL lens without a recessed lens board.
I wanted enough extension in the bellows to be able to use at least a 600mm lens, even though I do not own one......yet.
If you’re a large format photographer, you’ll likely understand that
many of these features are normally traded off, one for the other in
other cameras.
My requirement that the camera would be able to use lenses ranging from
very wide (72mm) to very long (600mm) was also potentially also very
demanding.
If you’re not a large format photographer then I can probably explain it like this: I wanted everything without making any compromises.
Be careful what you wish for…I will address each one and BOMM’s solution individually later.
Taking delivery
My camera (#12 produced by Max and his
partner), arrived on September 12, 2018. What Max delivered was
far beyond
my wildest expectations. I have a camera that is portable and sturdy,
with all of the functions I need to be able to make photographs that
satisfy my creative passion.
It is an instrument that does not require me to compromise, with the
icing on the cake being that it is a truly beautiful object created by
craftsmen who take incredible pride in their work.
The finish of the camera is flawless.
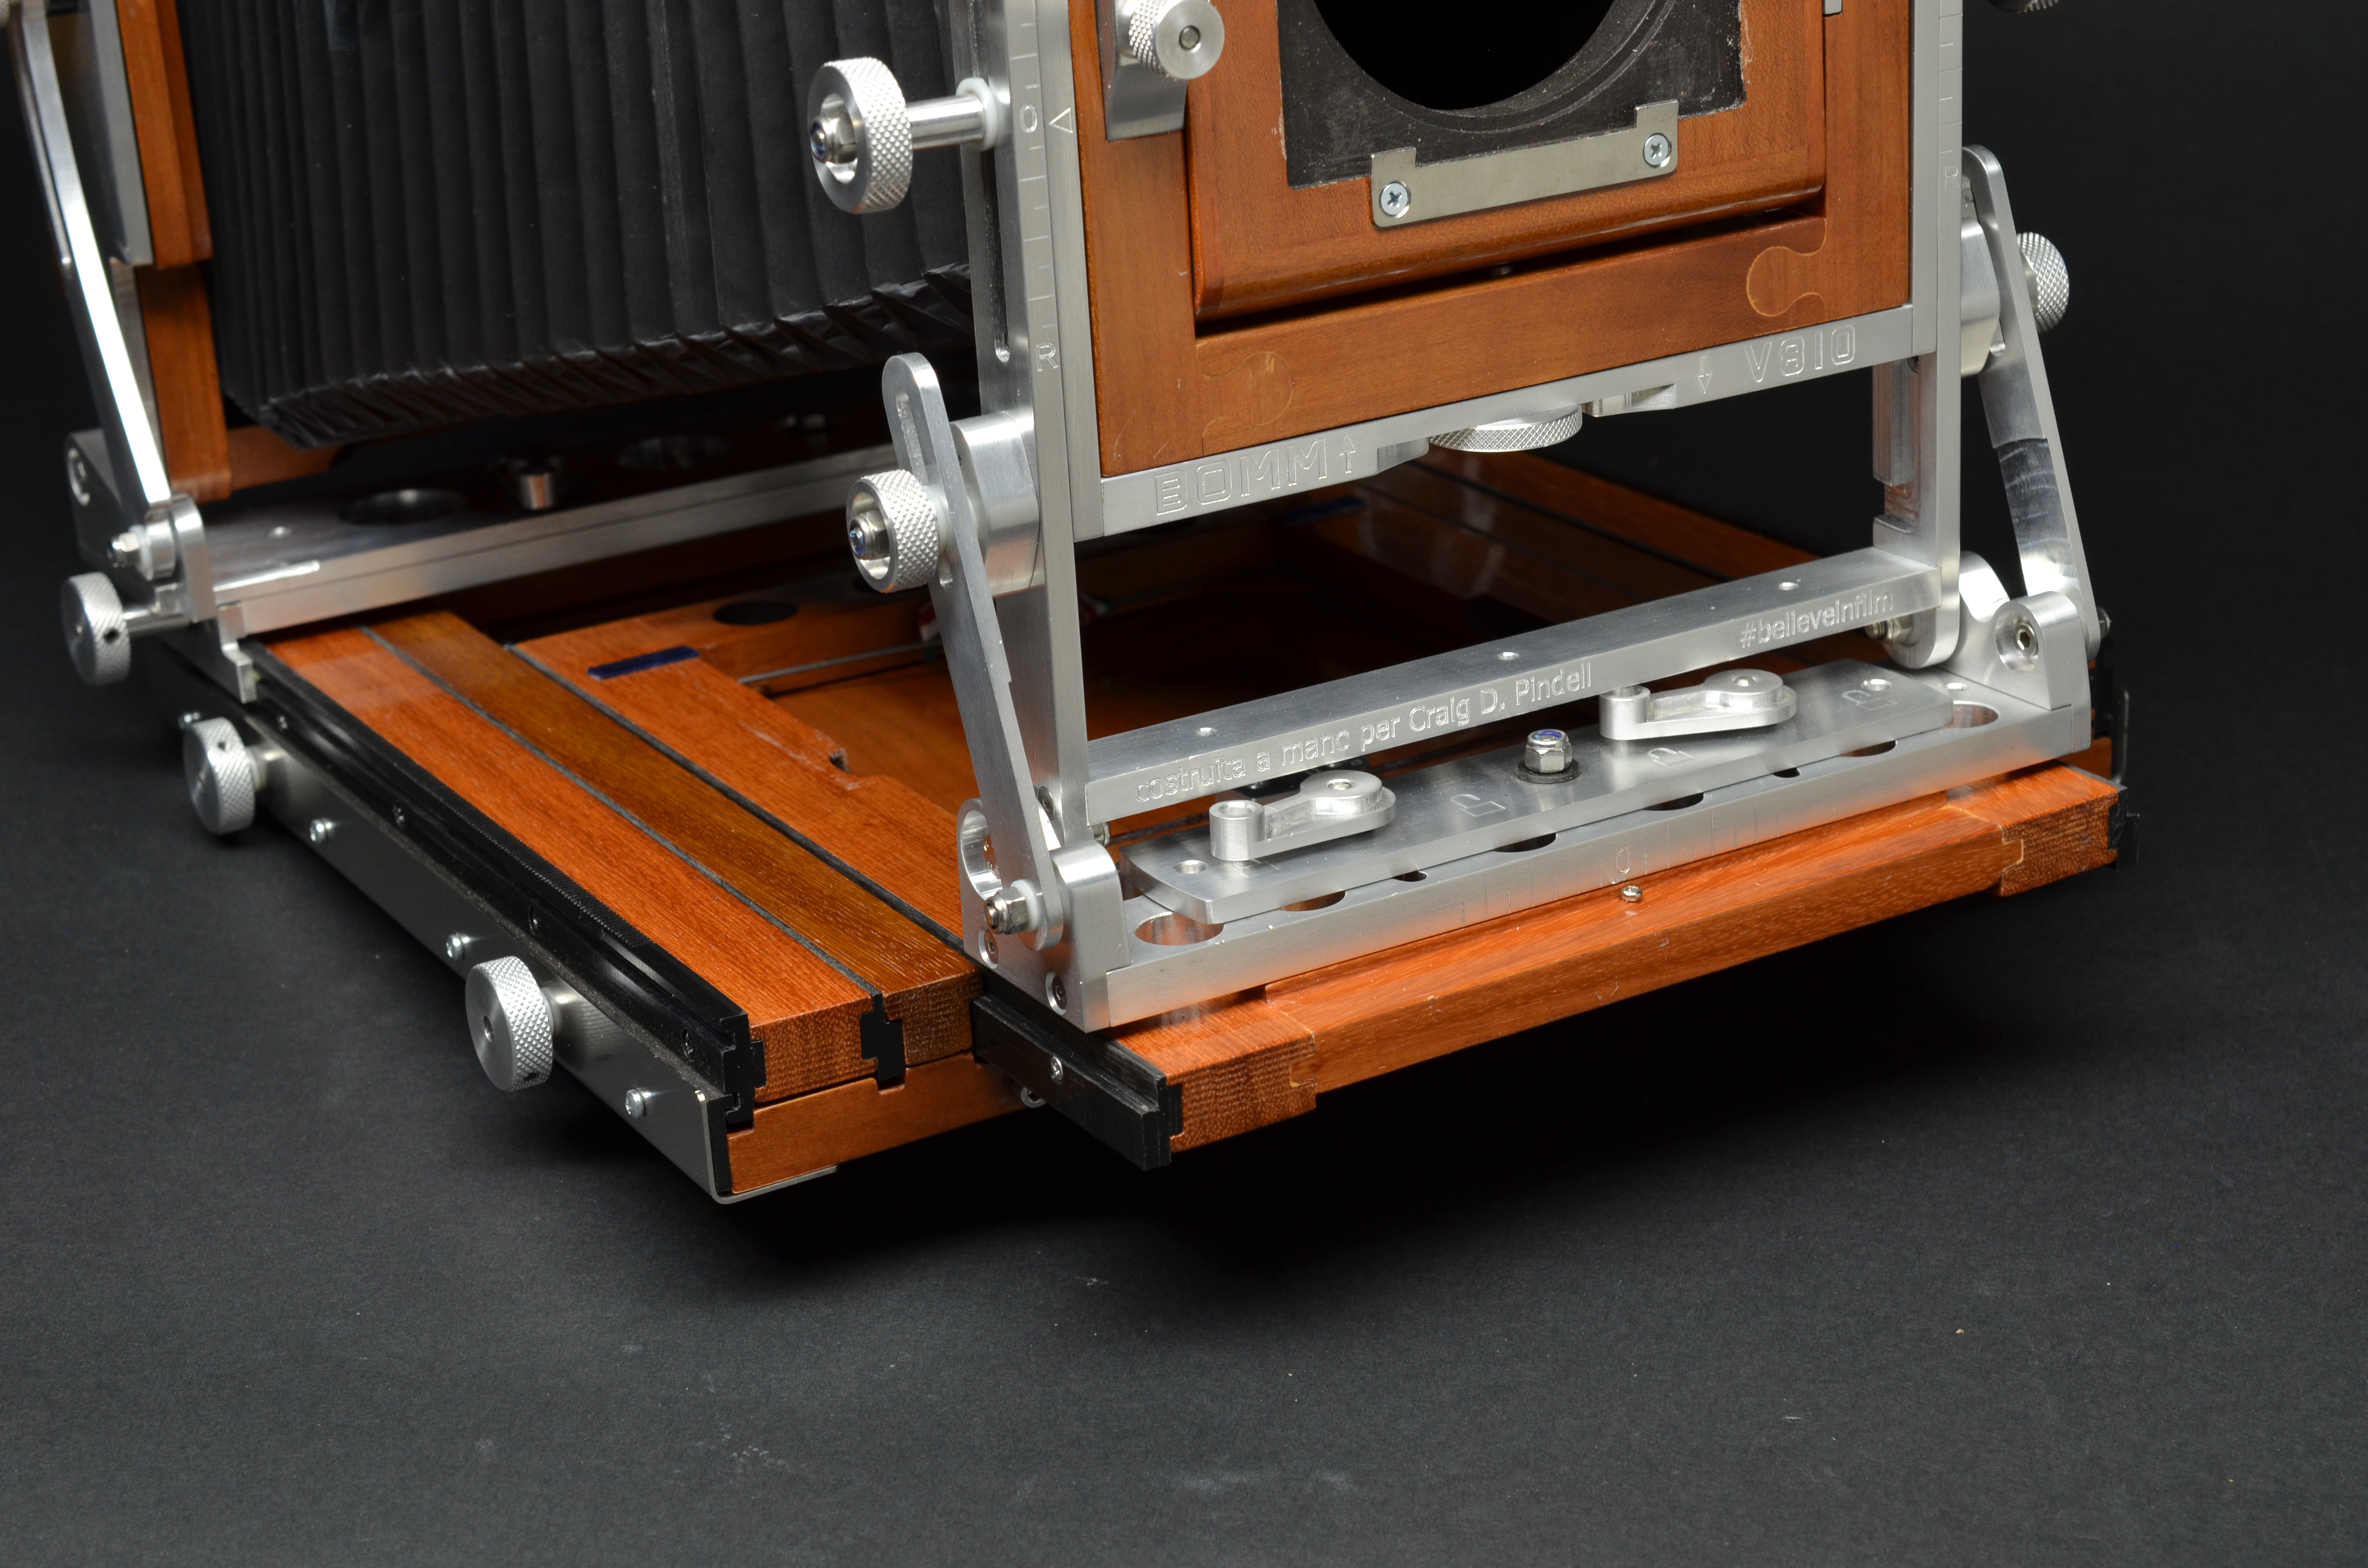

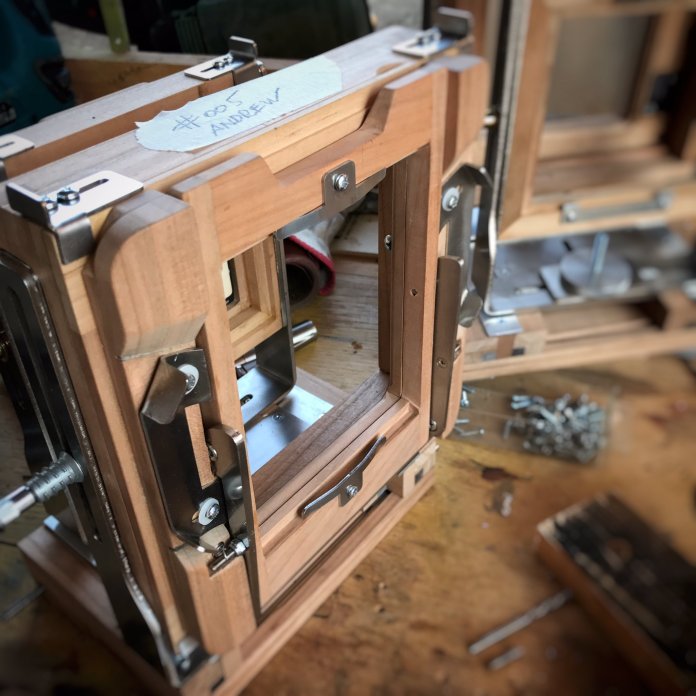
Box Joint on Rear Standard
All of the wood is shiny and polished and so smooth to the touch. Like
fine furniture. The metal pieces are the quality of fine timepieces.
Focus is smooth and consistent throughout the focus range on all three
beds. Opening and closing the camera really amplifies how much thought
went into the engineering of the camera.
This camera is a high-end field camera, but it certainly has all the movements of a studio camera – front and rear tilts, front and rear swings, front shift, front rise and fall. It is precise, it is sturdy and it is beautiful. The Linhof Master Technika 2000 has many of the same movements, so transitioning between the two is easy for me.

Trade-offs
The functionality does come at some cost, the first in weight. My 8×10
Kodak weighed 14.8 lbs, the BOMM weighs 15.6 lbs. There is also a bit of
difference in size when folded closed. The Kodak is 13 ¾ inches wide,
the BOMM is 14 ¾. The Kodak is 12 ½ inches tall, the BOMM is 13 ¼ inches
tall. And the Kodak is 4 7/8 inches thick and the BOMM is 5 ¼ inches
thick.
In return for being about an inch wider, an
inch taller, half an inch thicker and a pound heavier, the BOMM V810
delivers an incredible 28 inches (over 700mm) of maximum extension from
the film plane to the lens board. That’s 8 inches or 200mm more than the
Kodak.
The BOMM also includes a couple of features that have proven to be incredibly useful but were never on my radar before. The first is the bellows support. This is a bent wire hidden in between the rails of the camera base that hinges up to prop up the bellows. This is especially handy when using long lenses.
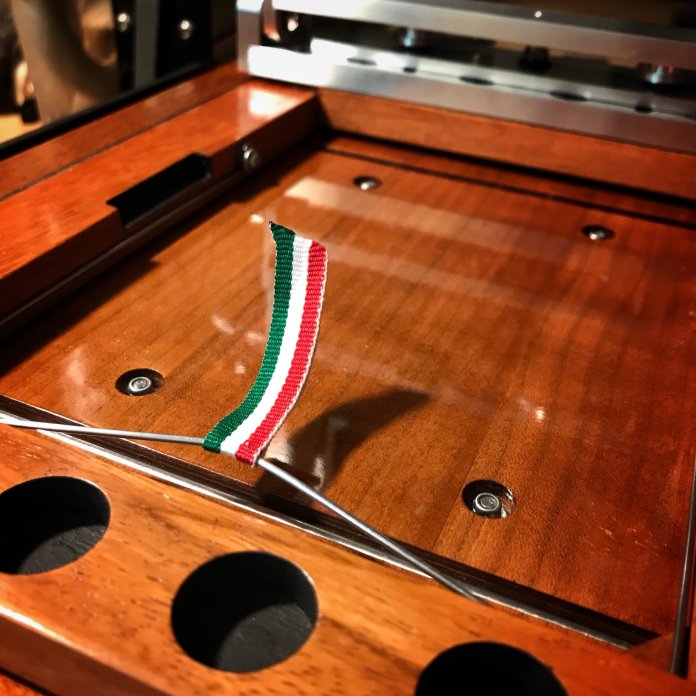
Bellows Support Wire
The other feature is the bubble level on the top of the rear standard (where it is most useful). The level has a protective hinged cover that has a mirror inside, so I am able to see the bubble from behind the camera without using a step ladder to be above the camera.
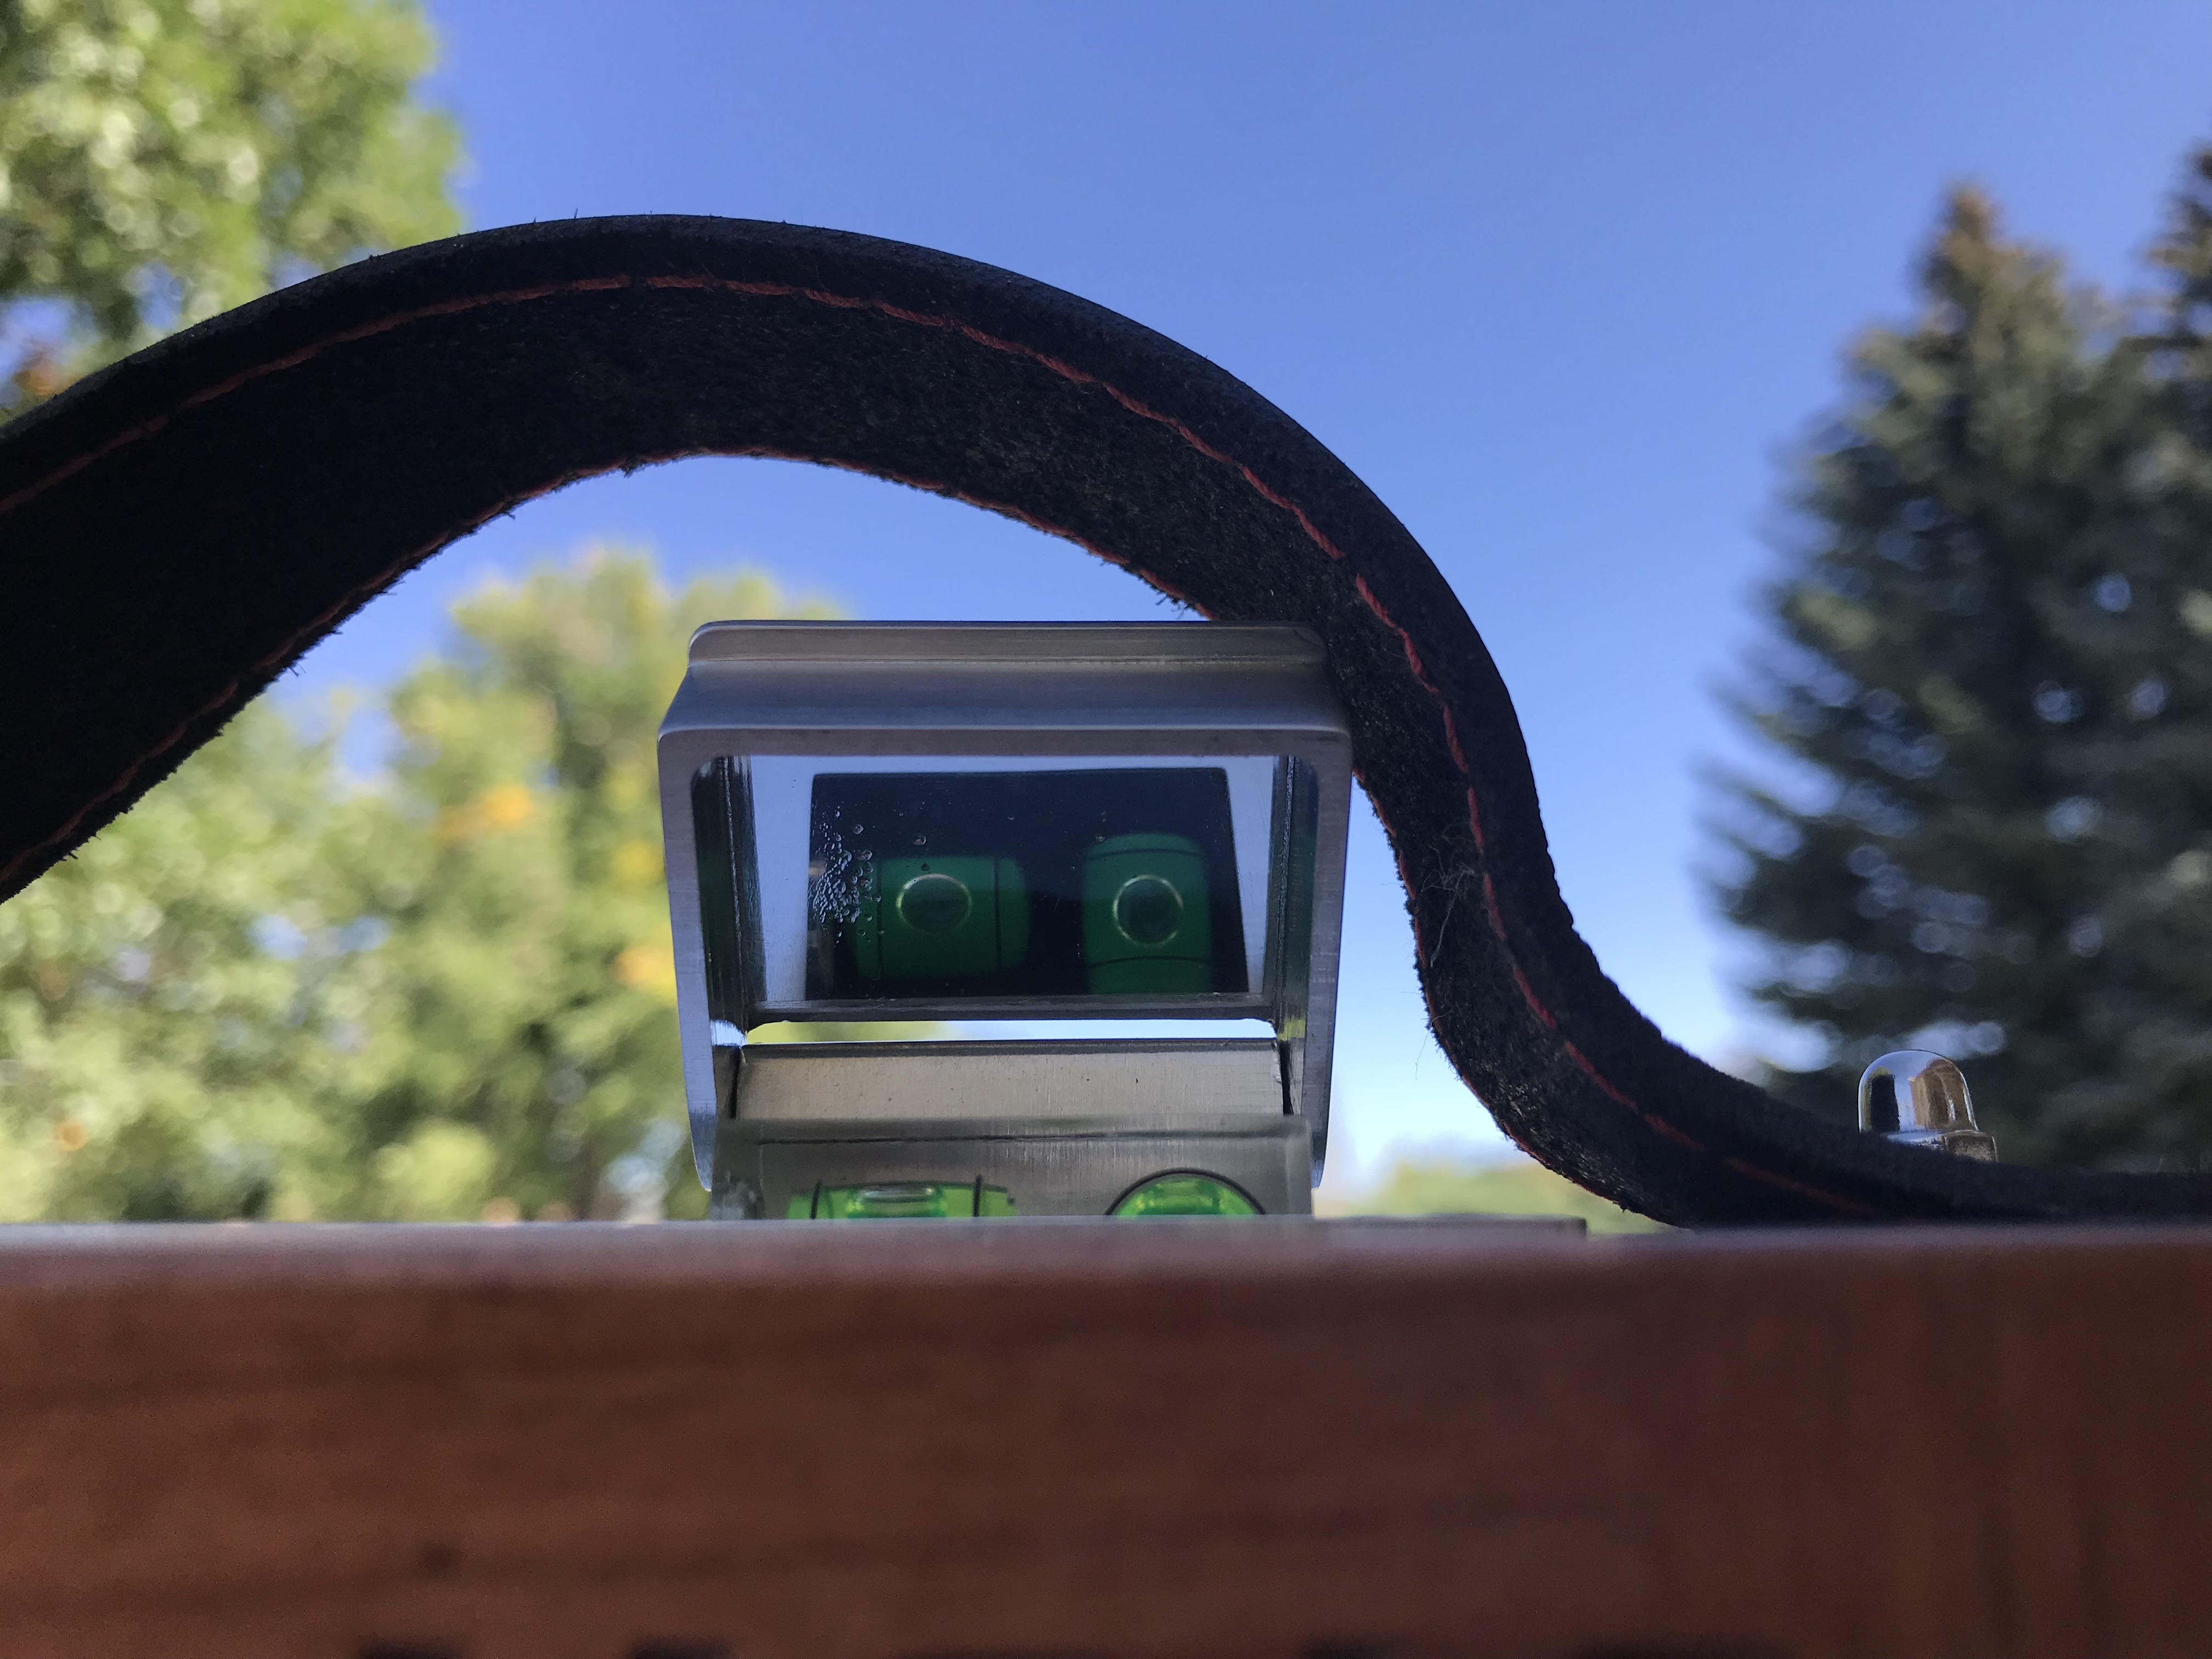
Bubble Levels
A demanding customer Satisfied
The Bomm has everything I requested and more! I am truly pleased with the result, and everyone that has seen the camera has been impressed with the craftsmanship and the capabilities of the camera.
Front standard
Rise and Fall - Max engineered a rise for the front standard that uses a knob directly under the lens. Adjusting this knob raises the lens incredibly precisely, and with very little effort.
There is not a lock on this knob, but in using it, it has never changed
once I adjusted it. This is better than I could have hoped for. The
coarse rise and fall adjustment is very similar to others cameras,
except for one really helpful feature: when opening the camera, the lens
board is lowered to the lowest position, rotated to the point it is
aligned with the front uprights, and then raised to the clearly marked
center position. The result of this is that using the coarse rise and
fall will not affect tilt.
On the other hand, if you choose to not align the lens board with the
standard uprights, the lens board will tilt when the knobs are loosened
to coarse rise and fall. I use the first method almost exclusively,
except when using the 72mm lens. When using the 72mm, I tilt the front
standard uprights toward the back of the camera, and add quite a bit of
rise, to move the lens closer to the rear standard, and this allows for
the lens board to be vertical. This all works much easier and much more
quickly than it sounds here.
Tilt - Max engineered a micro-tilt mechanism for the lens board that is one of the most amazing functions I have seen on a camera. I have never had this feature on any camera before, and it works better than I hoped.
I can make very precise tilt adjustments – on the axis of the lens. I do not have to tilt the standard, then readjust focus, then tilt again, refocus again, over and over again until I decide it is close enough. Even with the very narrow format of 617, I can quickly tilt the lens just enough for sharp focus and then move on. This is my favorite feature.
Swing and shift - Max engineered front swing and shift that is convenient and has strong detents so everything can be quickly and accurately returned to zero. When locked down, the front standard is very solid.
Rear standard
Bed and bellows
Camera Bed (a): Max engineered the front and rear standards in such a way they require very little fiddling, the lens and the back are close enough together that the 72mm focuses at infinity very easily. The bellows being folded up so tightly doesn't allow for much movement in this configuration, but the lens doesn't have enough coverage to allow for much movement anyway.
Camera Bed (b): When I asked Max to provide enough bellows draw for a 600mm lens, I knew it would be a stretch (no pun intended). I have not tried it yet, but I suspect using a 720mm lens ought to be possible. This was done with a bed design that is ingenious.
The rear standard can move forward for
shorter lenses, and to the rear for longer lenses. The front standard
rests at the front of its own bed, which moves forward for longer
lenses. As a fan of wide angle lenses, I really appreciate how the
design of the camera helps me avoid having the front bed in the photo.
This happened frequently with the Burke and James
and the
Kodak, and has not happened even once with the BOMM.
Lens compatibility
This camera is remarkable for its ability to focus the 72mm lens as well
as the 28 inches of available bellows draw. Movements are restricted
with the 72mm, mostly due to the bellows being so compacted, but I have
not found that to be an issue, and the 72mm barely covers the 6x17 format
anyway.
The 121mm Schneider Super Angulon is a very wide lens for 8×10 and is
one of my favorite lenses. The BOMM is a great pairing with this lens.
Max’s bed design allows the front standard to be far enough forward that
the bed is not in the image and allows the rear standard to move forward
to focus. It is easy and quick.
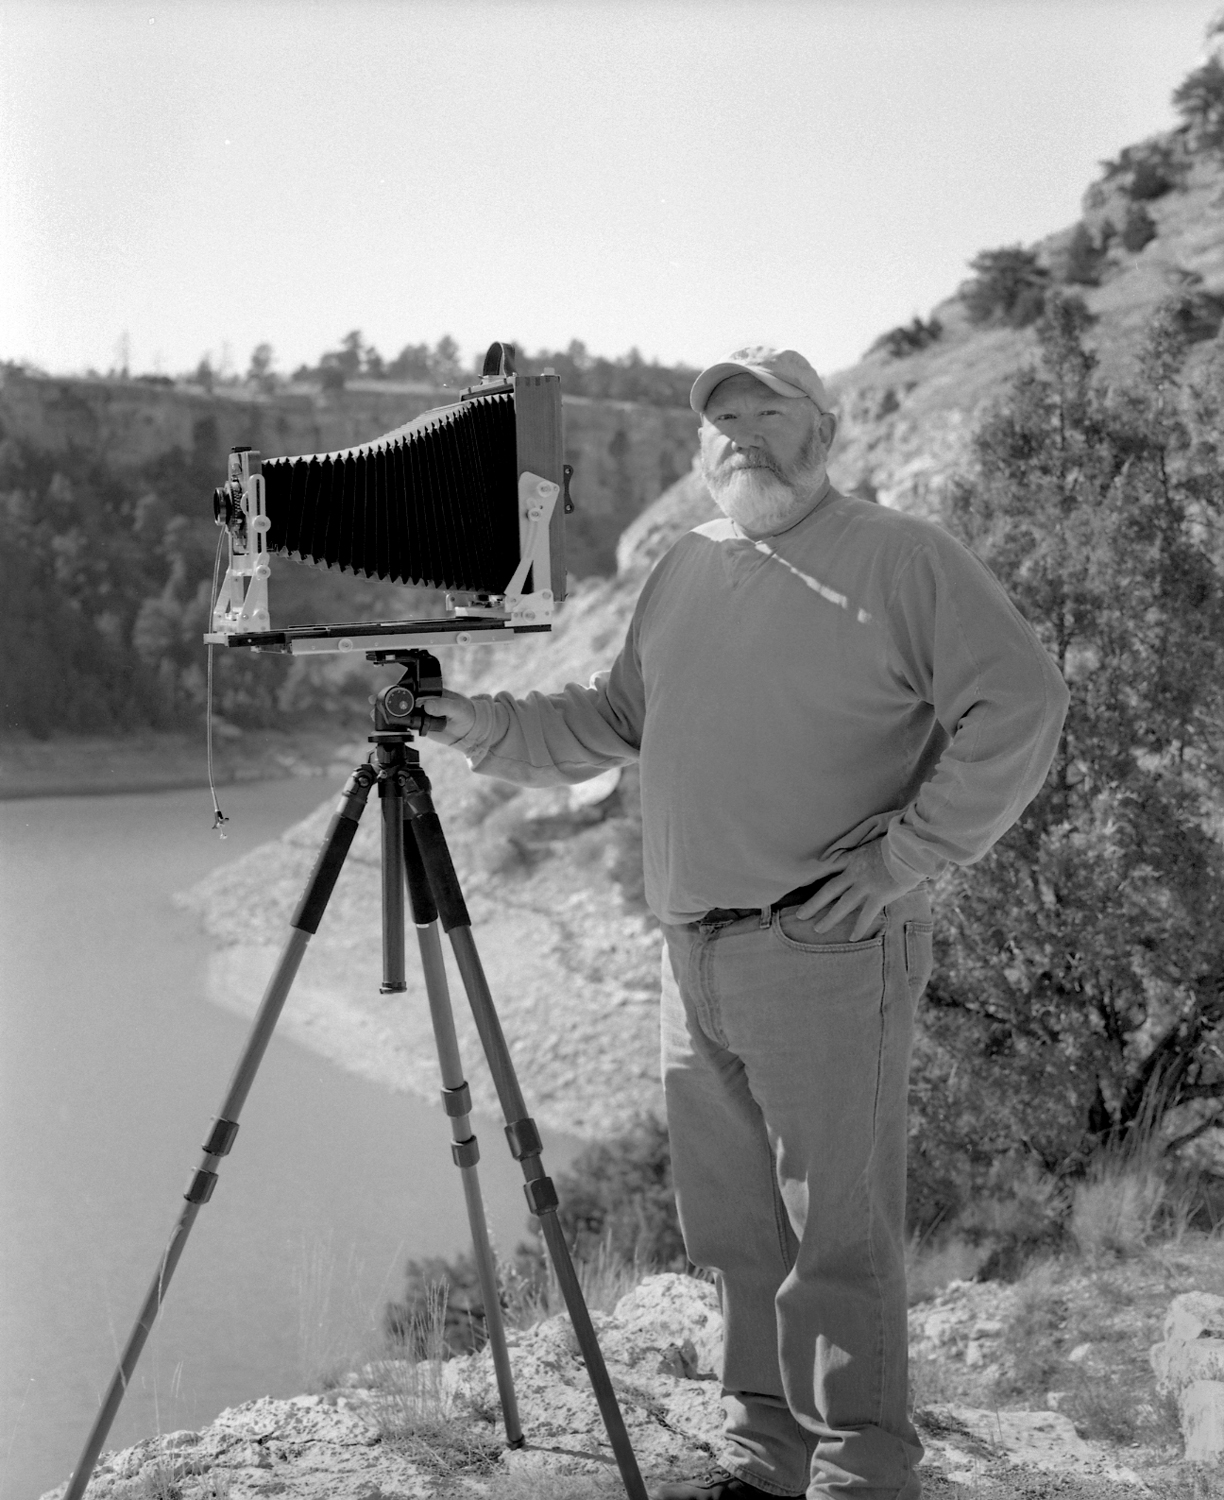
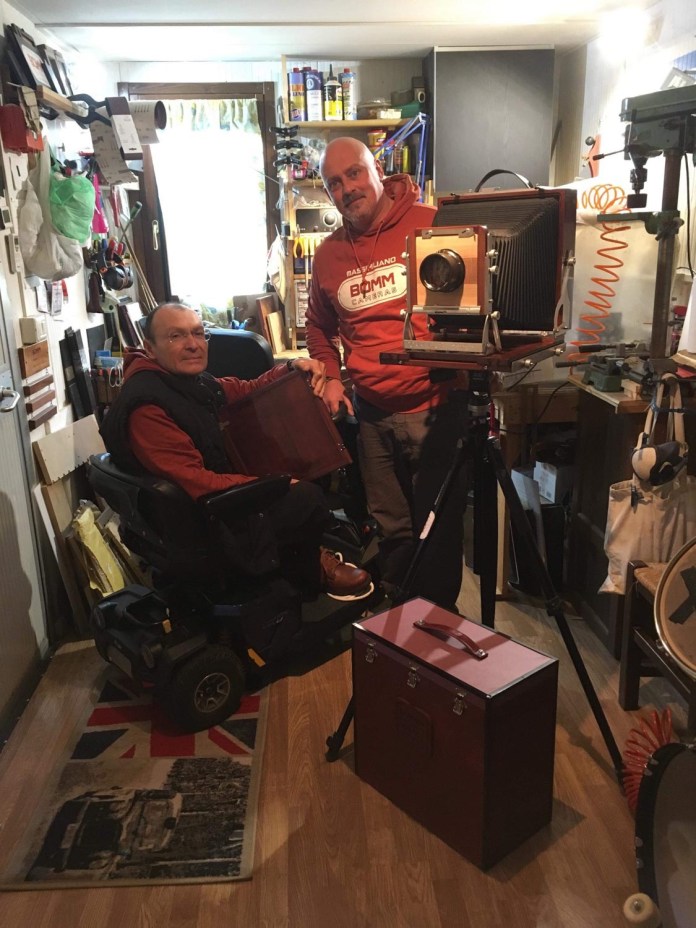
Bomm V810 with 450mm installed (me for scale)
The 240mm Lens is my “normal” lens. When focused at infinity the front
bed and rear bed are barely extended. At this extension, the camera
moves easily beyond the coverage of the lens. The bellows are more than
flexible enough to allow all movements. The camera is very stable.
The 450mm lens is my telephoto lens, for now, although it is not actually very
telephoto for 8×10. I mostly see photographs in wide angle, so it is
plenty long for what I do. I have used this lens more for 6x17 work than
I ever thought I would.
While these lenses are my usual 8×10 kit, Max designing this camera to
fit my usual Linhof boards, I also can use my 47mm, 58mm, 65mm, 90mm,
150mm, 210mm, and 300mm that I have for 4×5 though everything wider than
90mm would be problematic due to lens coverage issues.
Accessories
A large part of my decision to have this camera built was due to Max’s assurance he could build a reducing back that would accommodate my DaYi 617 back. The back I use on this camera is the 5×7 version of the DaYi, and requires a 5×7 Graflock. This was not available for the Kodak. I could have converted to 4×10 for my panoramic work, but the ultimate goal was to be able to shoot my favorite film – ILFORD PAN F PLUS, which is not available in sheet film format. 6×17 format is the closest I could come to shooting PAN F PLUS in large format.
BOMM V810 5×7 back and DaYi 617 holder installed on camera.
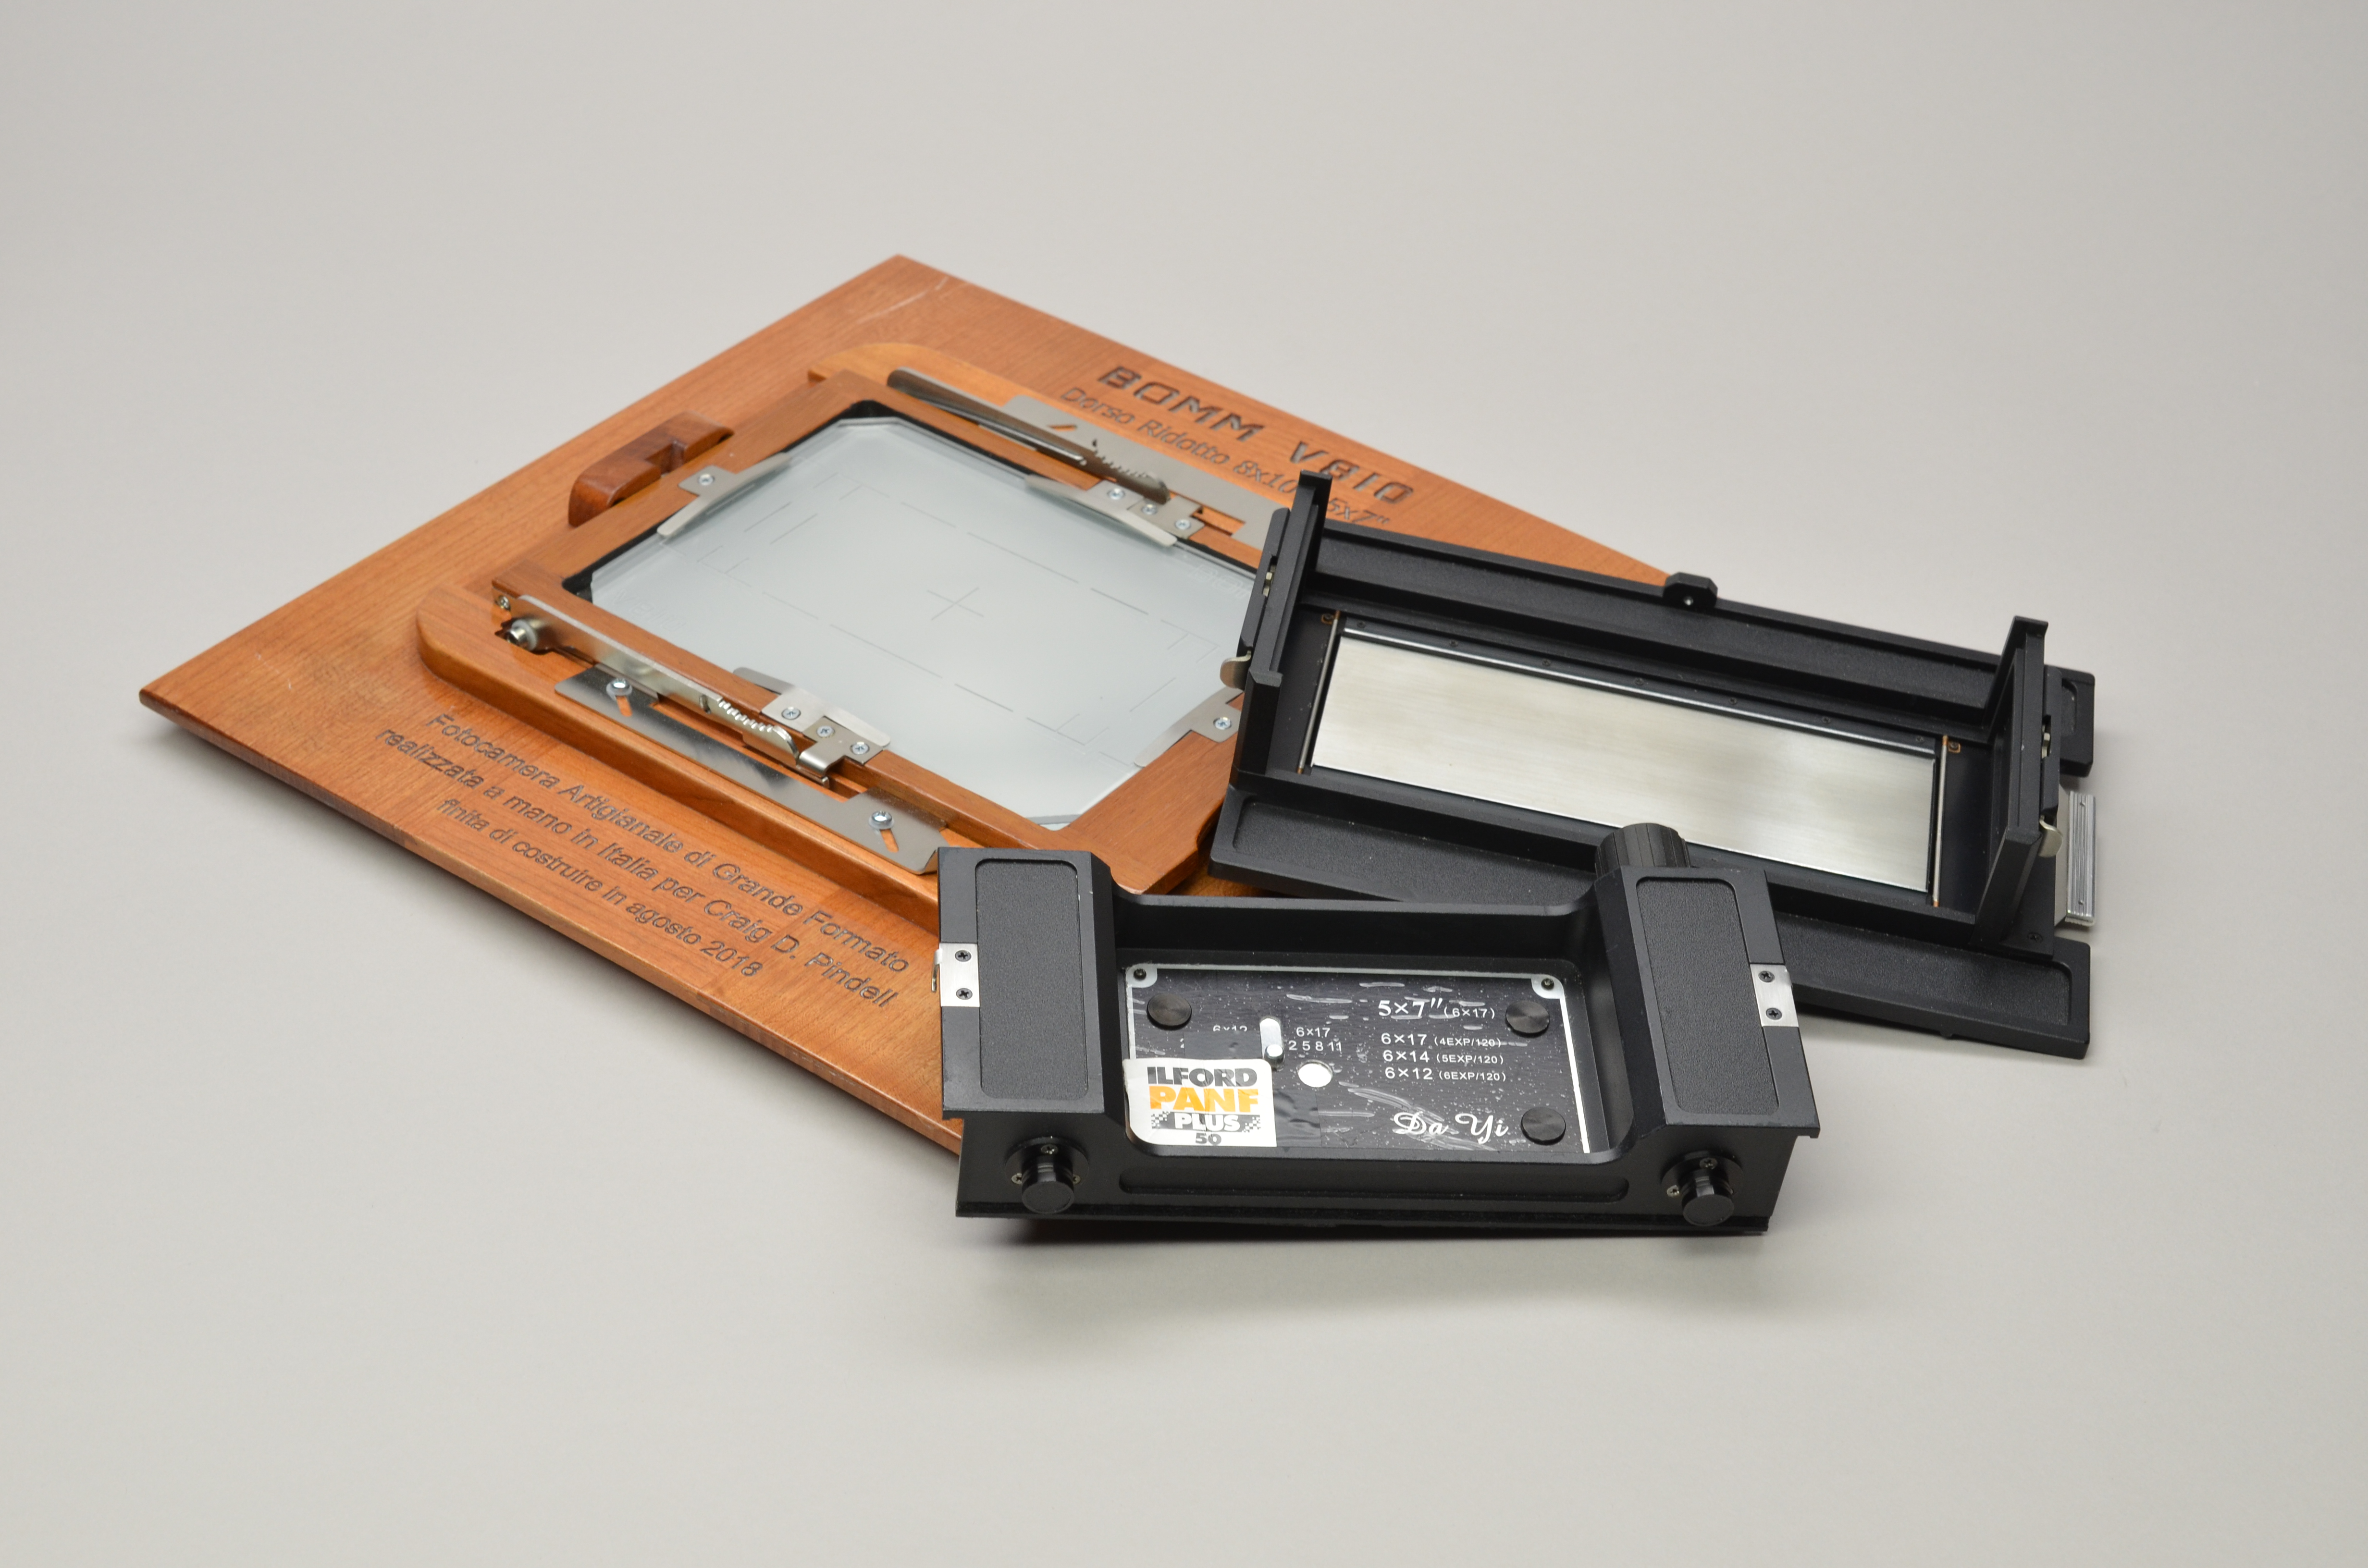
Bomm V-810 5x7 reducing back and DaYi 6x17 Film Holder
Max truly exceeded my expectations for this back. The Graflok works perfectly and holds the back precisely. He also included 6x17 framing on the 5×7 ground glass, and as far as I can tell from my tests, the ground glass markings exactly match the resulting negatives. It works easily, and having the view camera movements for the 617 format has really been a joy.
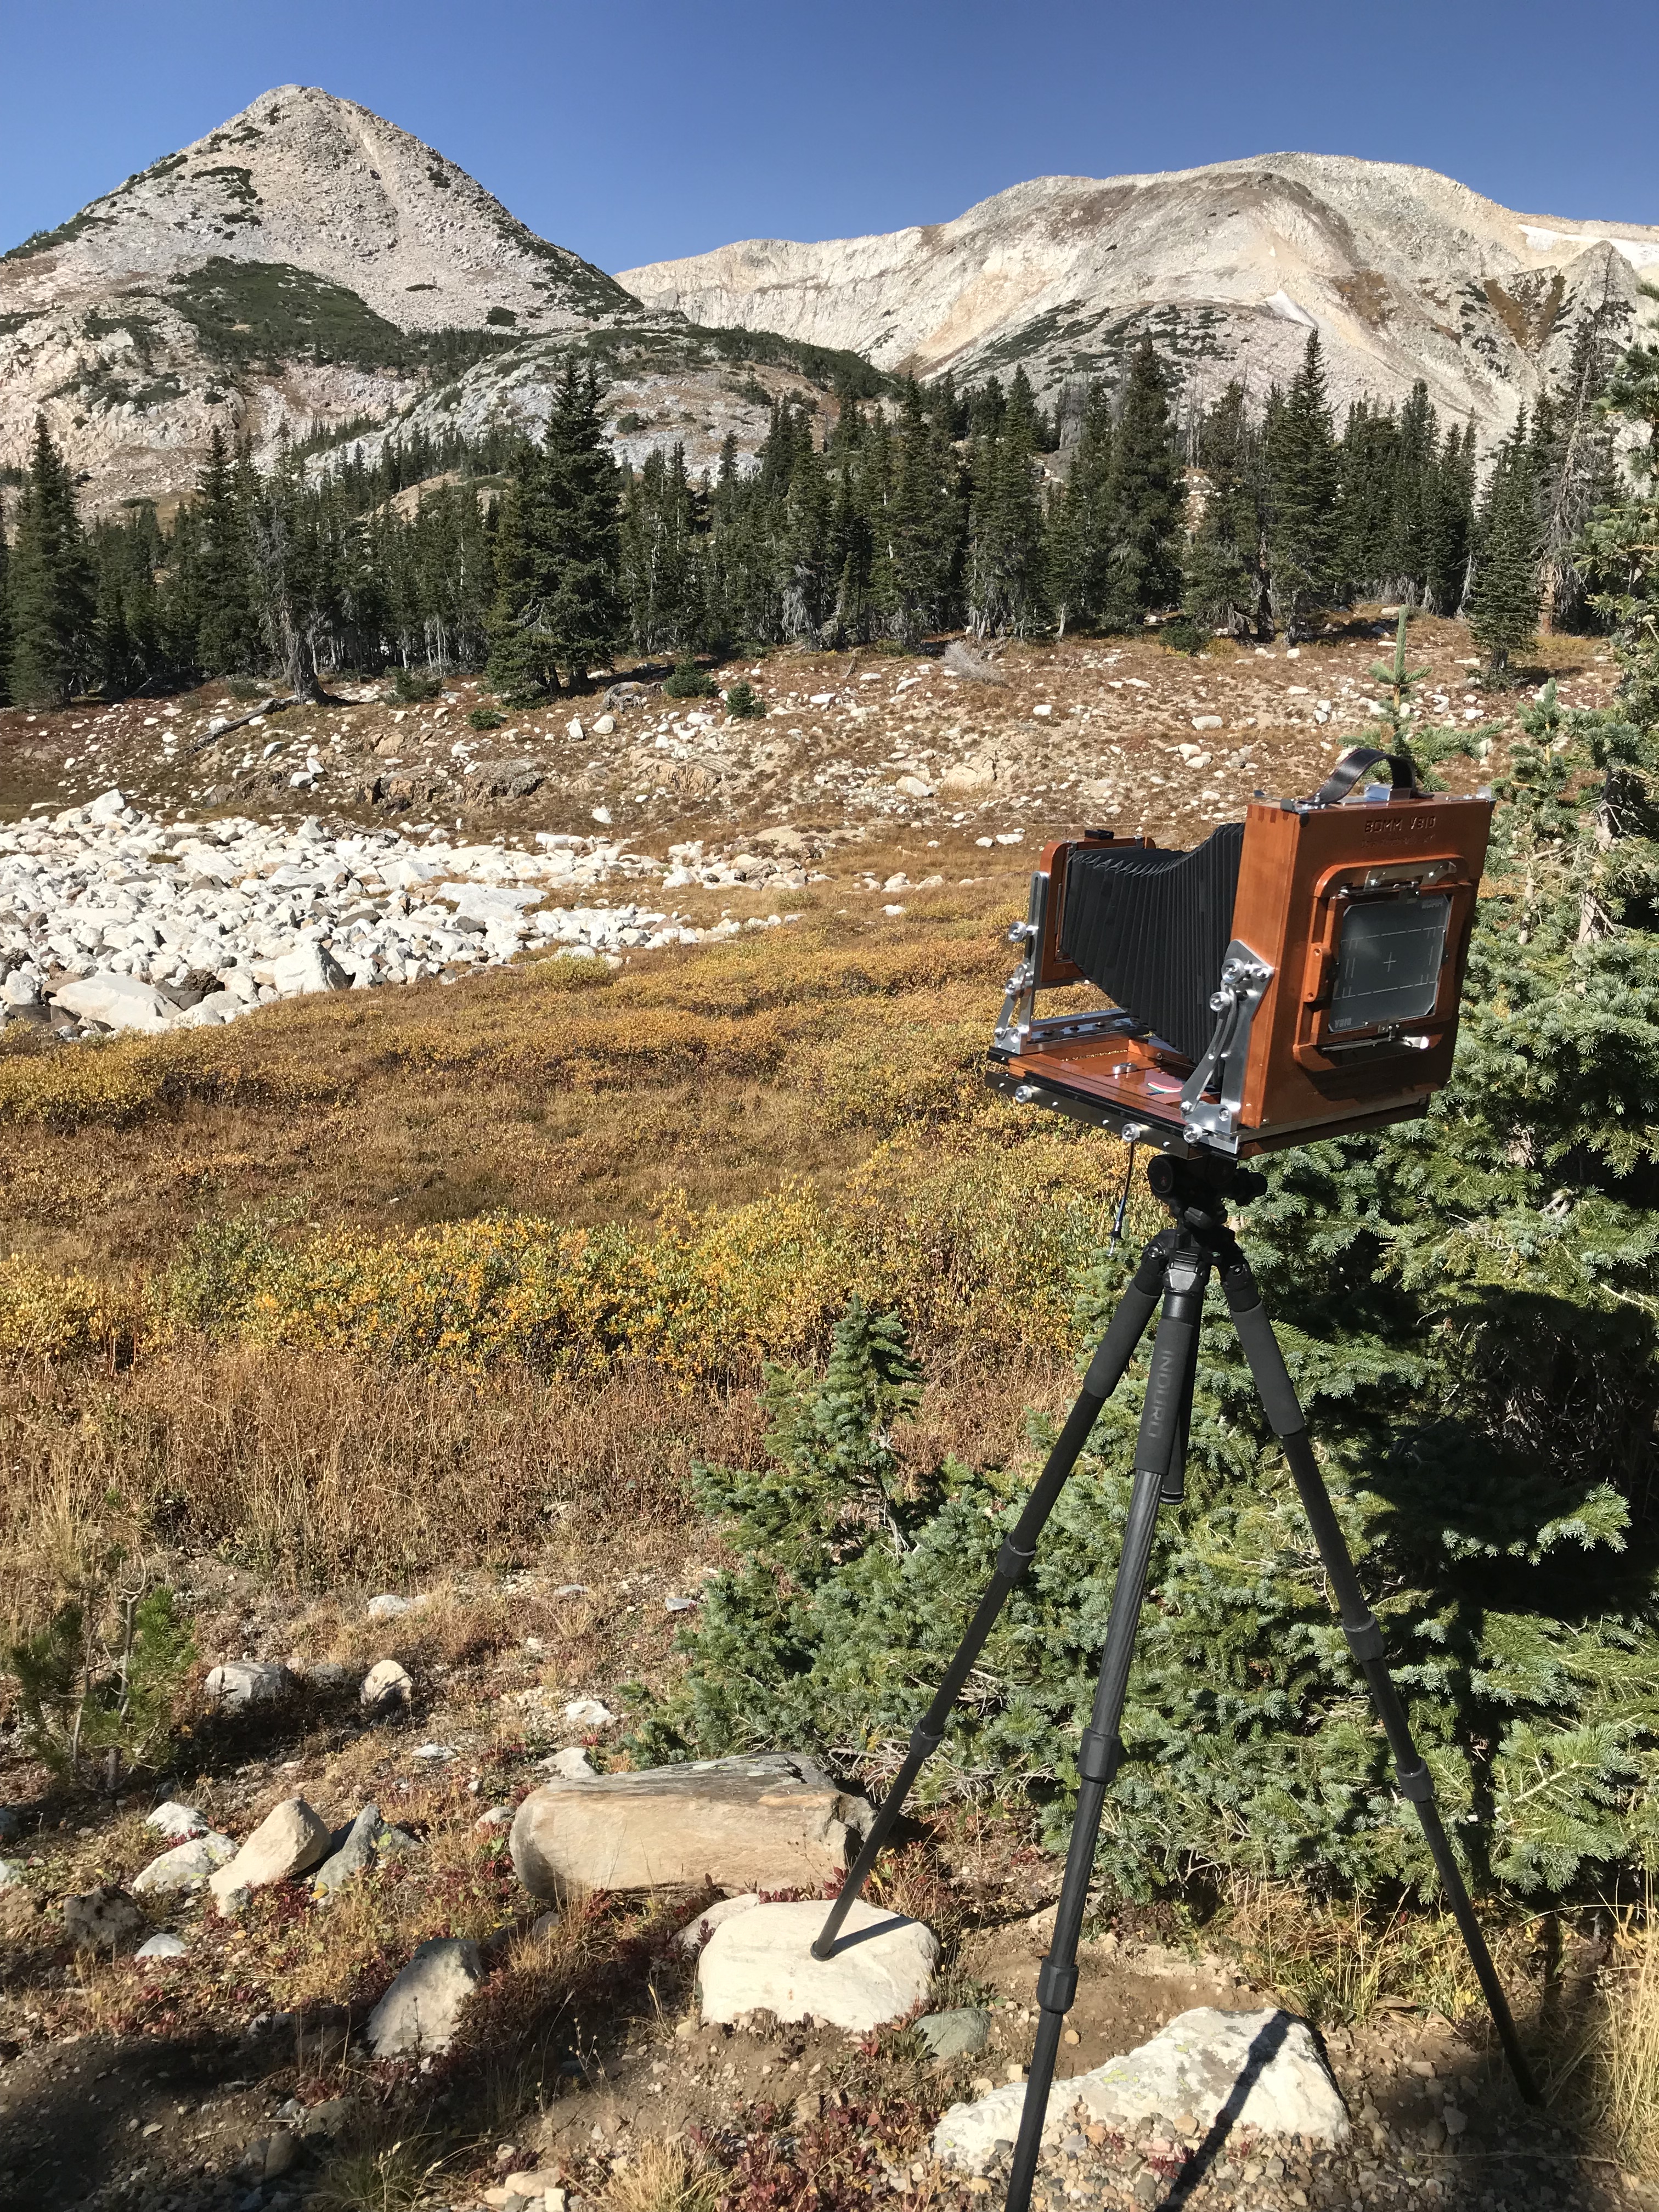
In the field
One word of caution, and I mean this sincerely. I was somewhat expecting a similar reaction to the BOMM as I used to get with my Zone VI 4x5 camera. Folks would be interested and want to see the camera, ask some questions and then move on. The reaction to the BOMM is nothing like that. If you want to fade into the scenery and keep to yourself, the BOMM is not the choice. This camera draws more attention than a movie star on a red carpet.
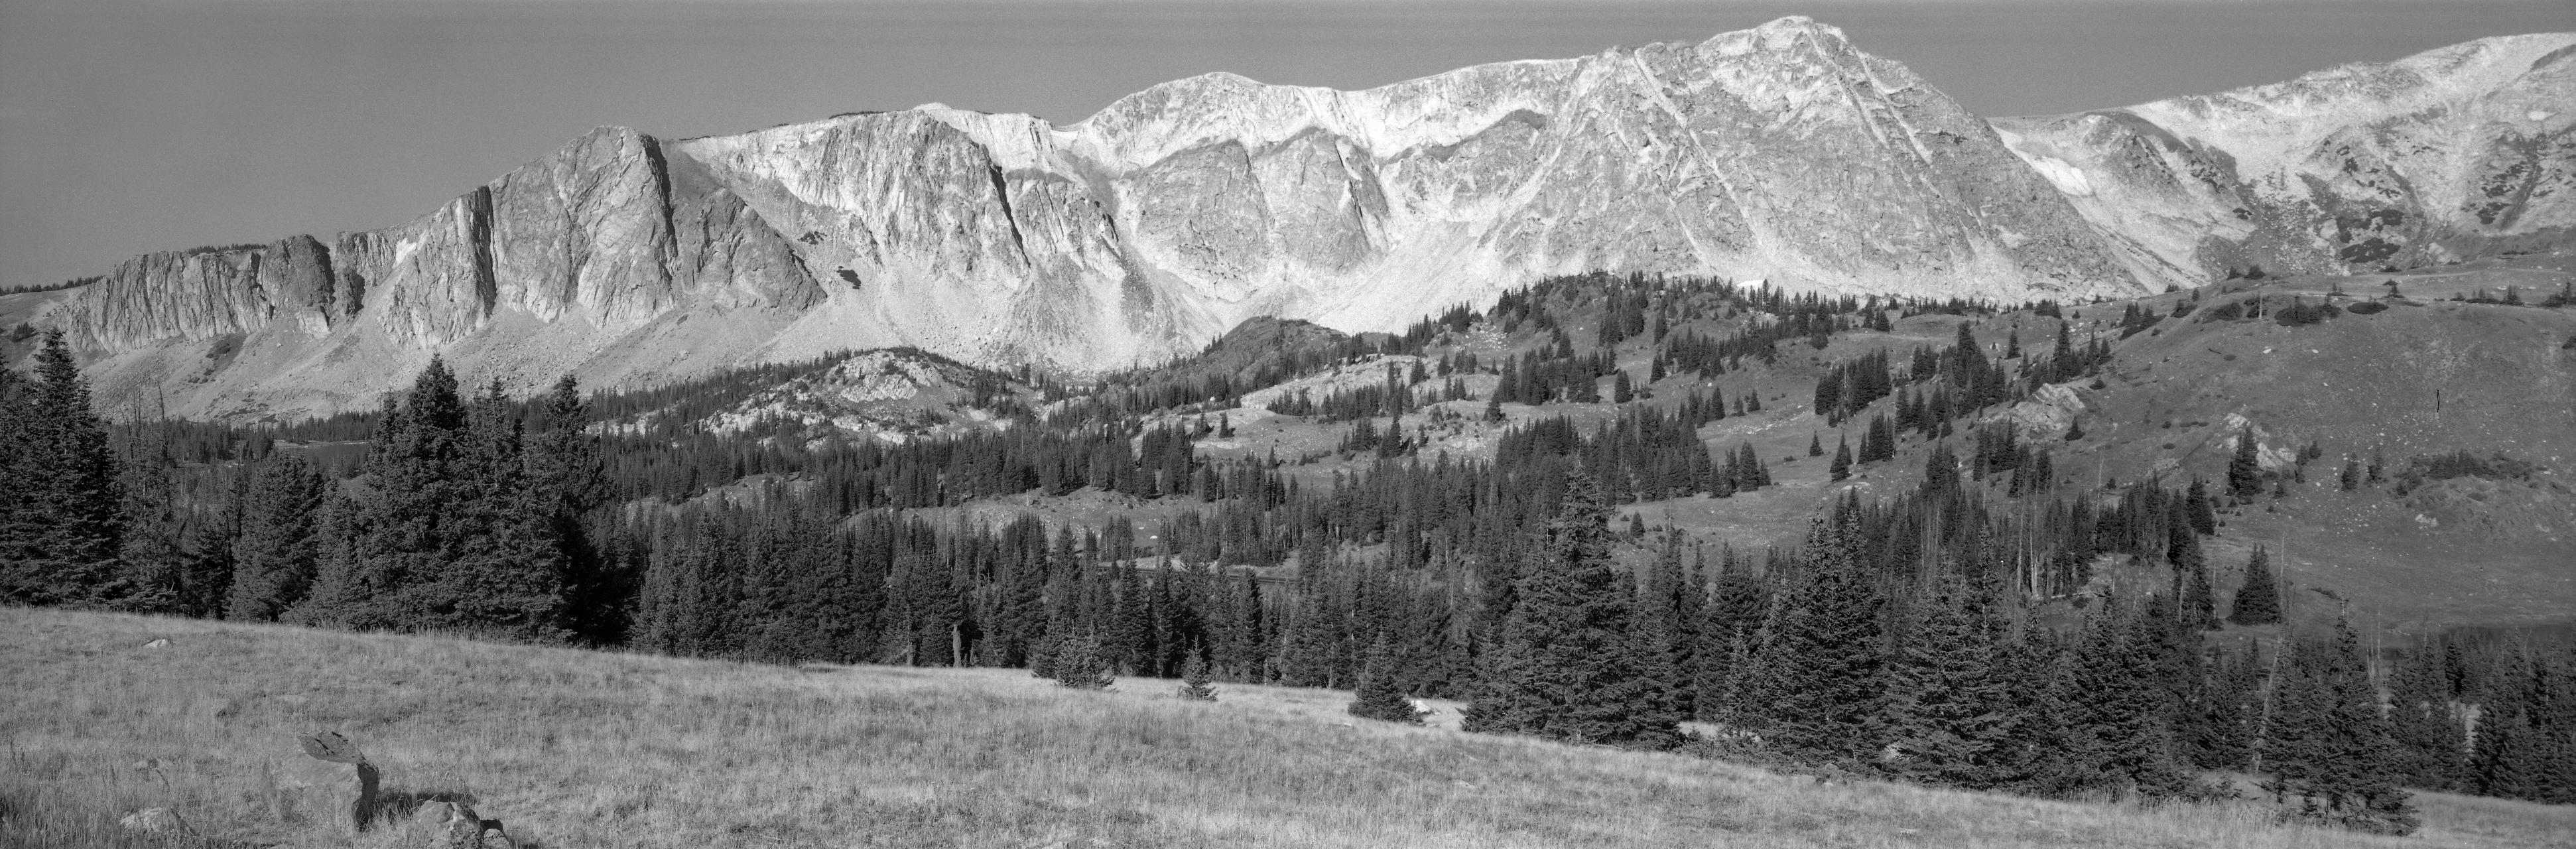
Taken with the 6×17 back on the BOMM V810 and 250mm lens
On my first trip out, I was photographing high in the Snowy Range of
Wyoming. It was a weekday, so there weren’t many folks out. It was also
breezy and chilly. I was at a viewing area about ¼ mile from the
highway, experimenting with the 6×17 back, photographing a range of
12,000-foot mountain peaks.
I heard a car pass on the highway, then the tires screech, and finally
the revving of the engine as the car made a U-turn in the middle of the
mountain road. Shortly the car pulled up and the couple nearly jumped
out to look at the camera. After asking several questions and closely
examining the camera, they left me to my work. Neither were
photographers, but both commented that they could not believe how
beautiful the camera looked.
A Bit of History
I have been a photographer since the 1960's, but did not get serious about photography until the middle 1970's. I started with 126 format and progressed from there to 35mm, on to a Mamiya RB67 for portraiture, then to a Hasselblad 500cm for weddings. I went back to 35mm when I went to photojournalism school then on to 4x5 when I became obsessed with landscape photography (a Zone VI and then Linhofs)
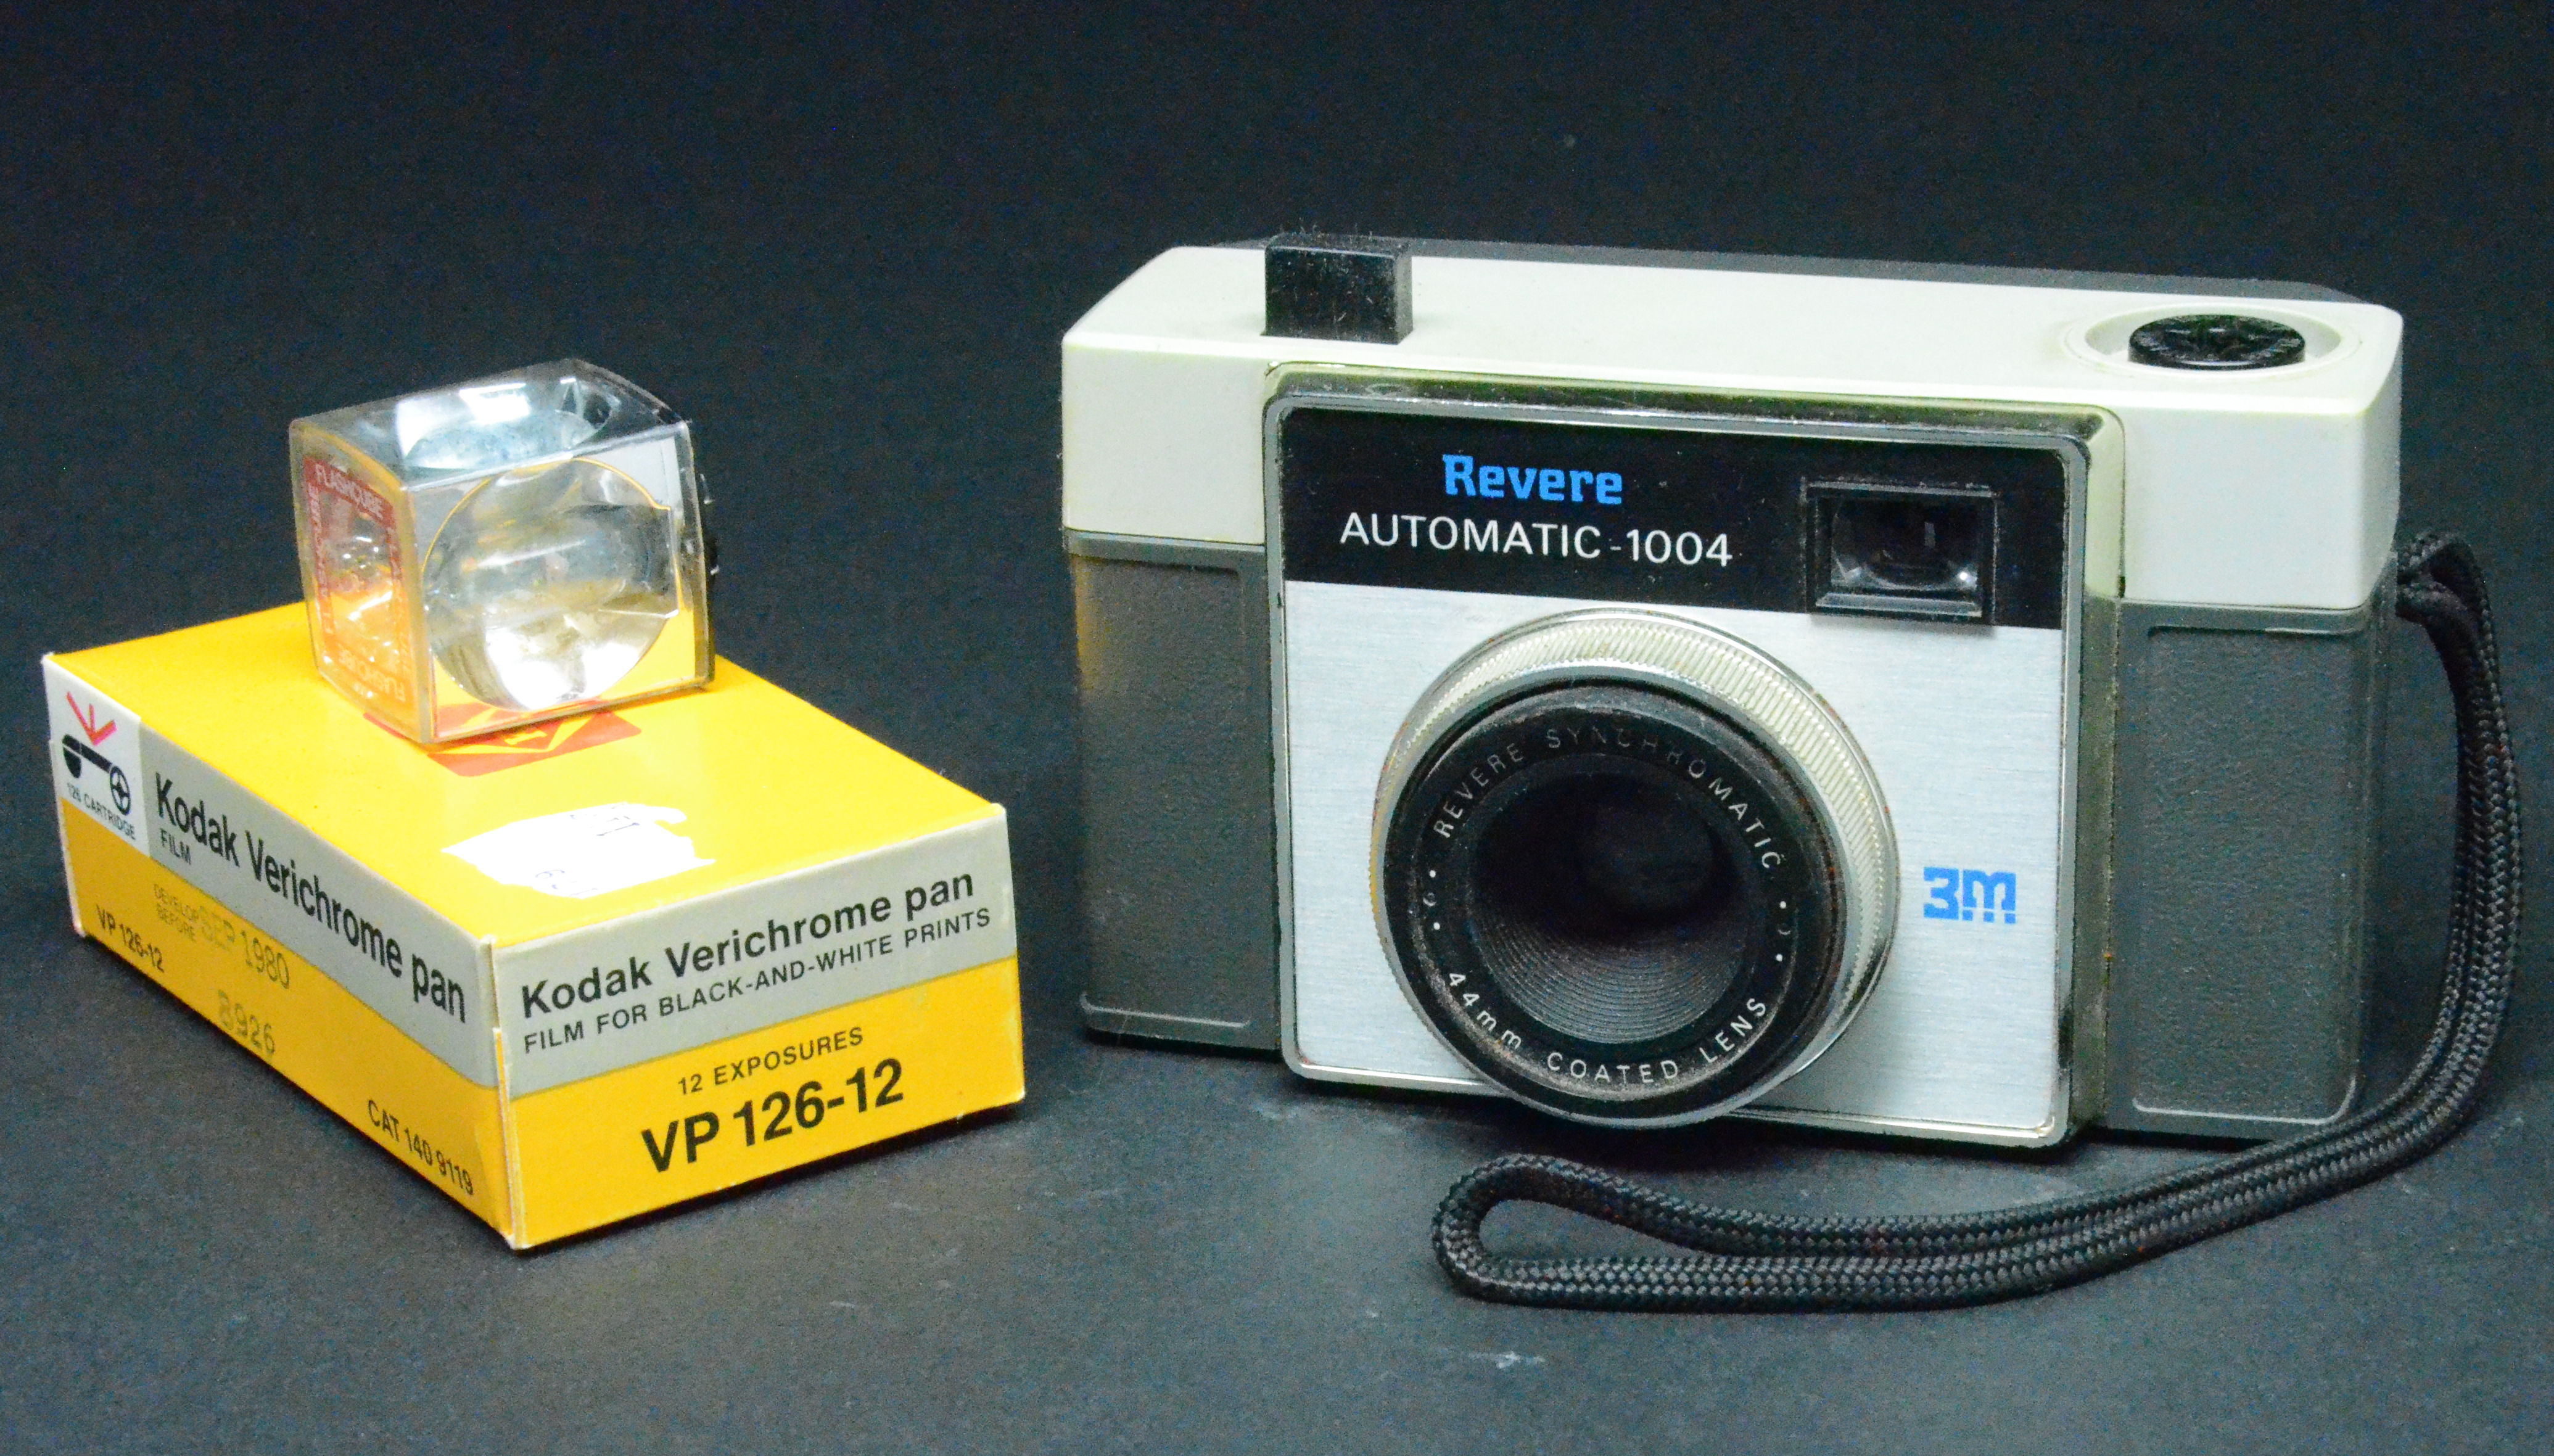
My First Camera - Revere 126
Around the year 2000, I decided the best landscape photographs had been
created with 8×10, and I purchased a Burke and James 8×10 camera. The
camera had been well used, but it was what I could afford. I quickly
learned that repairing the old camera was not too difficult and even
with the low-quality lenses I had at the time, the 8×10 negatives were
amazing.
I didn’t have an enlarger, so I contact printed the images, and
they were okay, but not spectacular. I blamed the results on the camera
and lenses, so set about saving for a proper camera and lenses. I had
seen Jay Dusard using a Kodak Master View camera at one of the workshops
I had attended, and while I was shopping for a new camera, a lightly
used Kodak came up on eBay. I bought it as quickly as I could. That was
about 2005, if I remember correctly.
Later that year a good friend of mine gave me an 8×10 enlarger he had
crafted using an Omega D2 Enlarger
chassis and an Aristo Cold Light Head. I knew that my negatives looked
great, and being able to enlarge them would prove it in a way that
contact printing never could (in spite of all of Edward Weston’s
evidence to the contrary).
At the point I bought the Burke and James, I felt I was competent enough as a 4×5 user to be able to master the 8×10 quickly. I was so wrong. I made almost all of the same rookie mistakes I had made with 4×5 - I made exposures with the dark slide still in the holder, I pulled the dark slide with the lens still open for focusing, I rushed making exposures and did not focus carefully enough, I forgot to close down the aperture before making the exposure.
As I used the Kodak and became more comfortable with the beast, these
mistakes went away, and the results improved. The camera and I came to
terms, and my film waste declined. I didn’t want to go back and relearn
a camera at this point. I wanted a camera that would allow me to keep
improving, and to keep an acceptable success rate.
Photography with the BOMM V810
You’ll see a few photographs made with the BOMM V810 and lenses
mentioned dotted throughout the article to this point. Here are a few
more. The “Christmas Card” photograph presented a few challenges, none
of which were with the camera in the adverse weather I encountered. The
photographer, on the other hand, developed a loud annoying whine before
the day was through. Temperatures were in the single digits F, with wind
chills well below zero F. I have included both 8×10 and 6×17 format
photographs here.
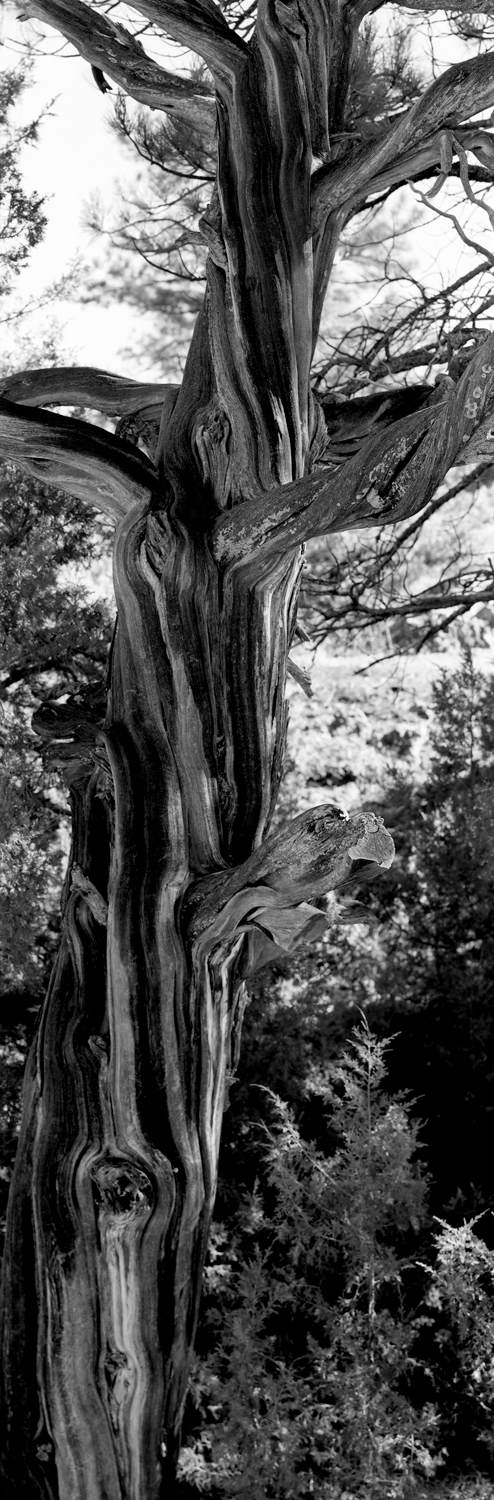
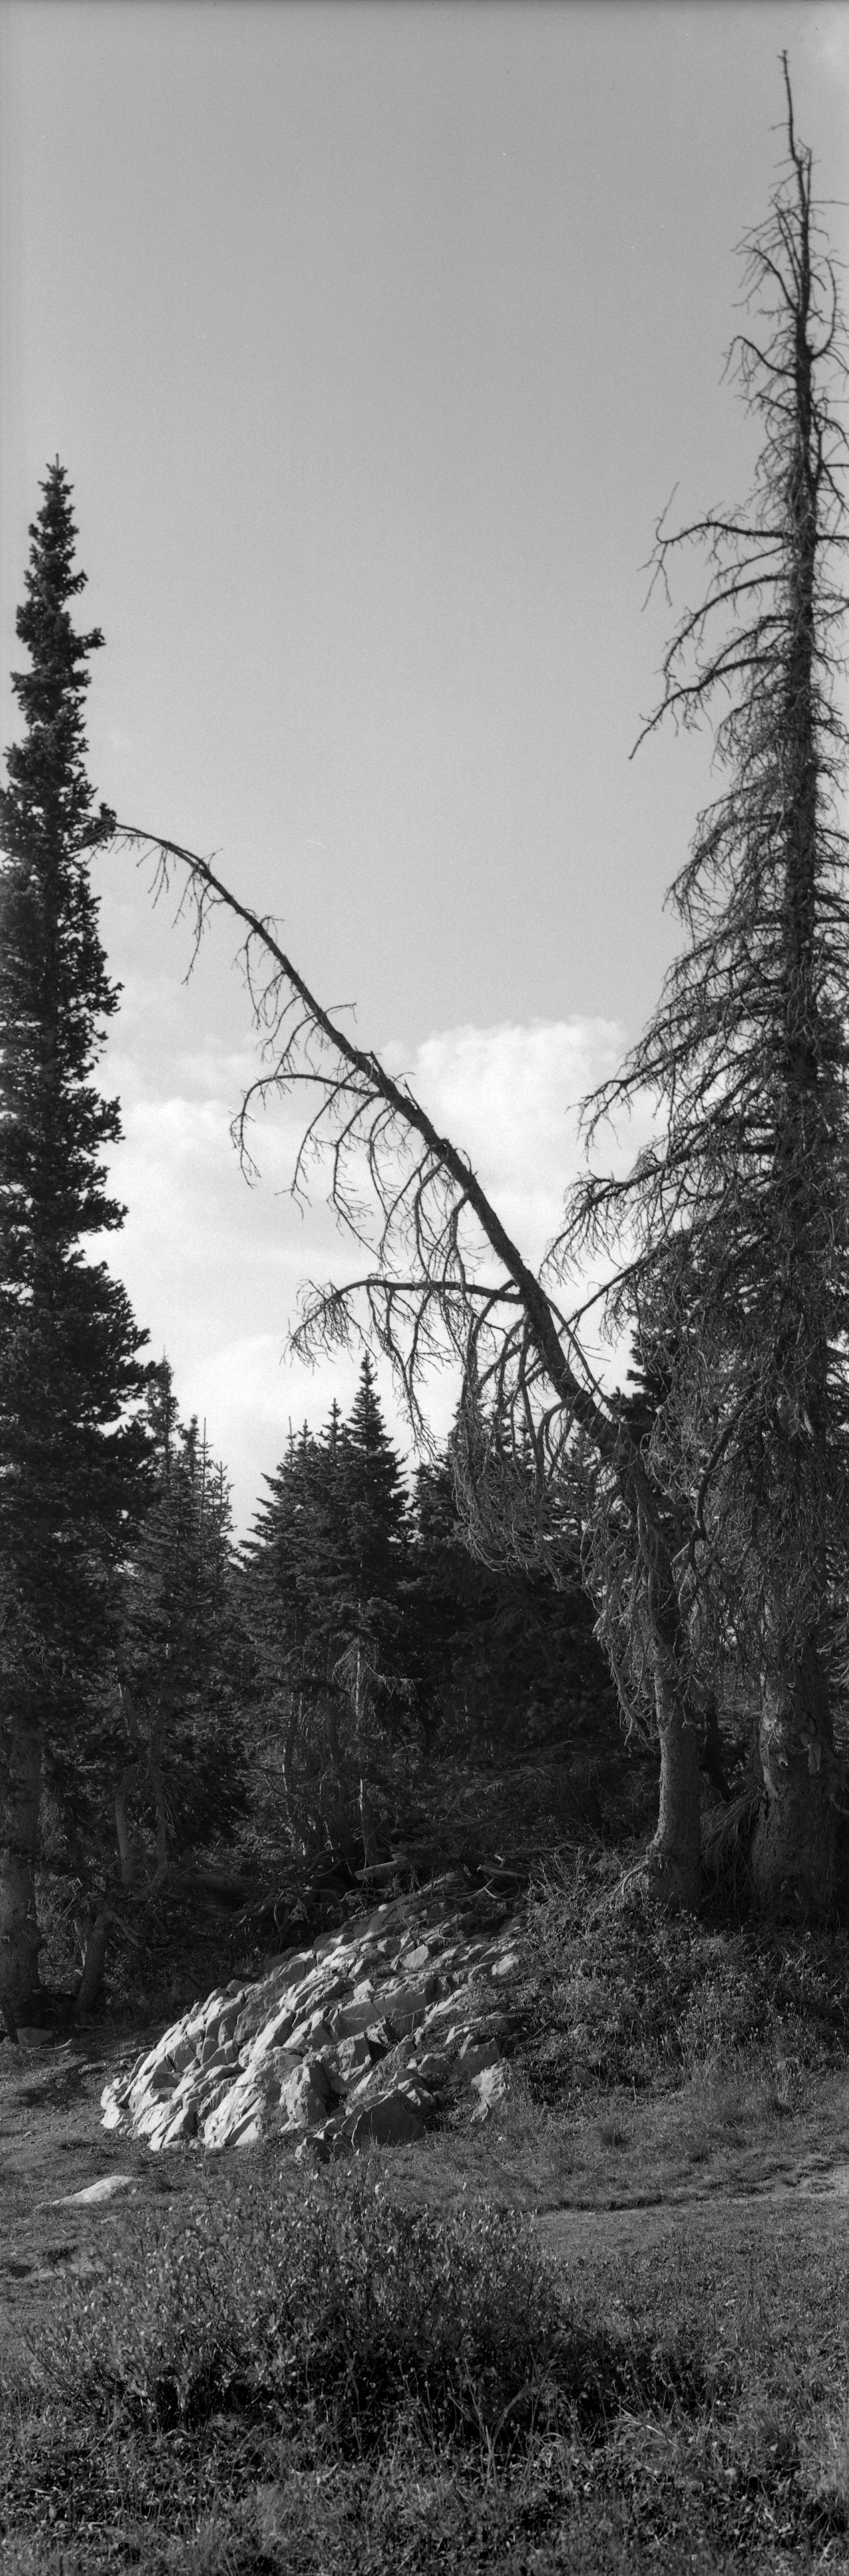
Twisted Tree - DaYi 6x17 Back, Ilford Pan F+ film and orange filter
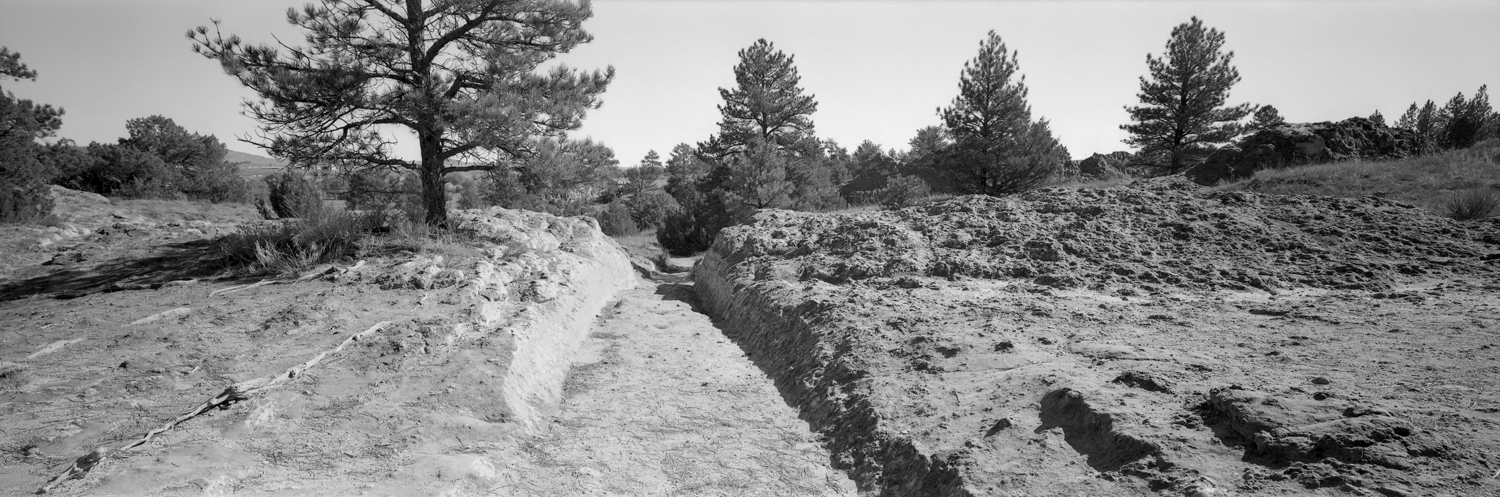
Oregon Trail Ruts - DaYi 6x17 Back, Ilford Pan F+ film and orange filter
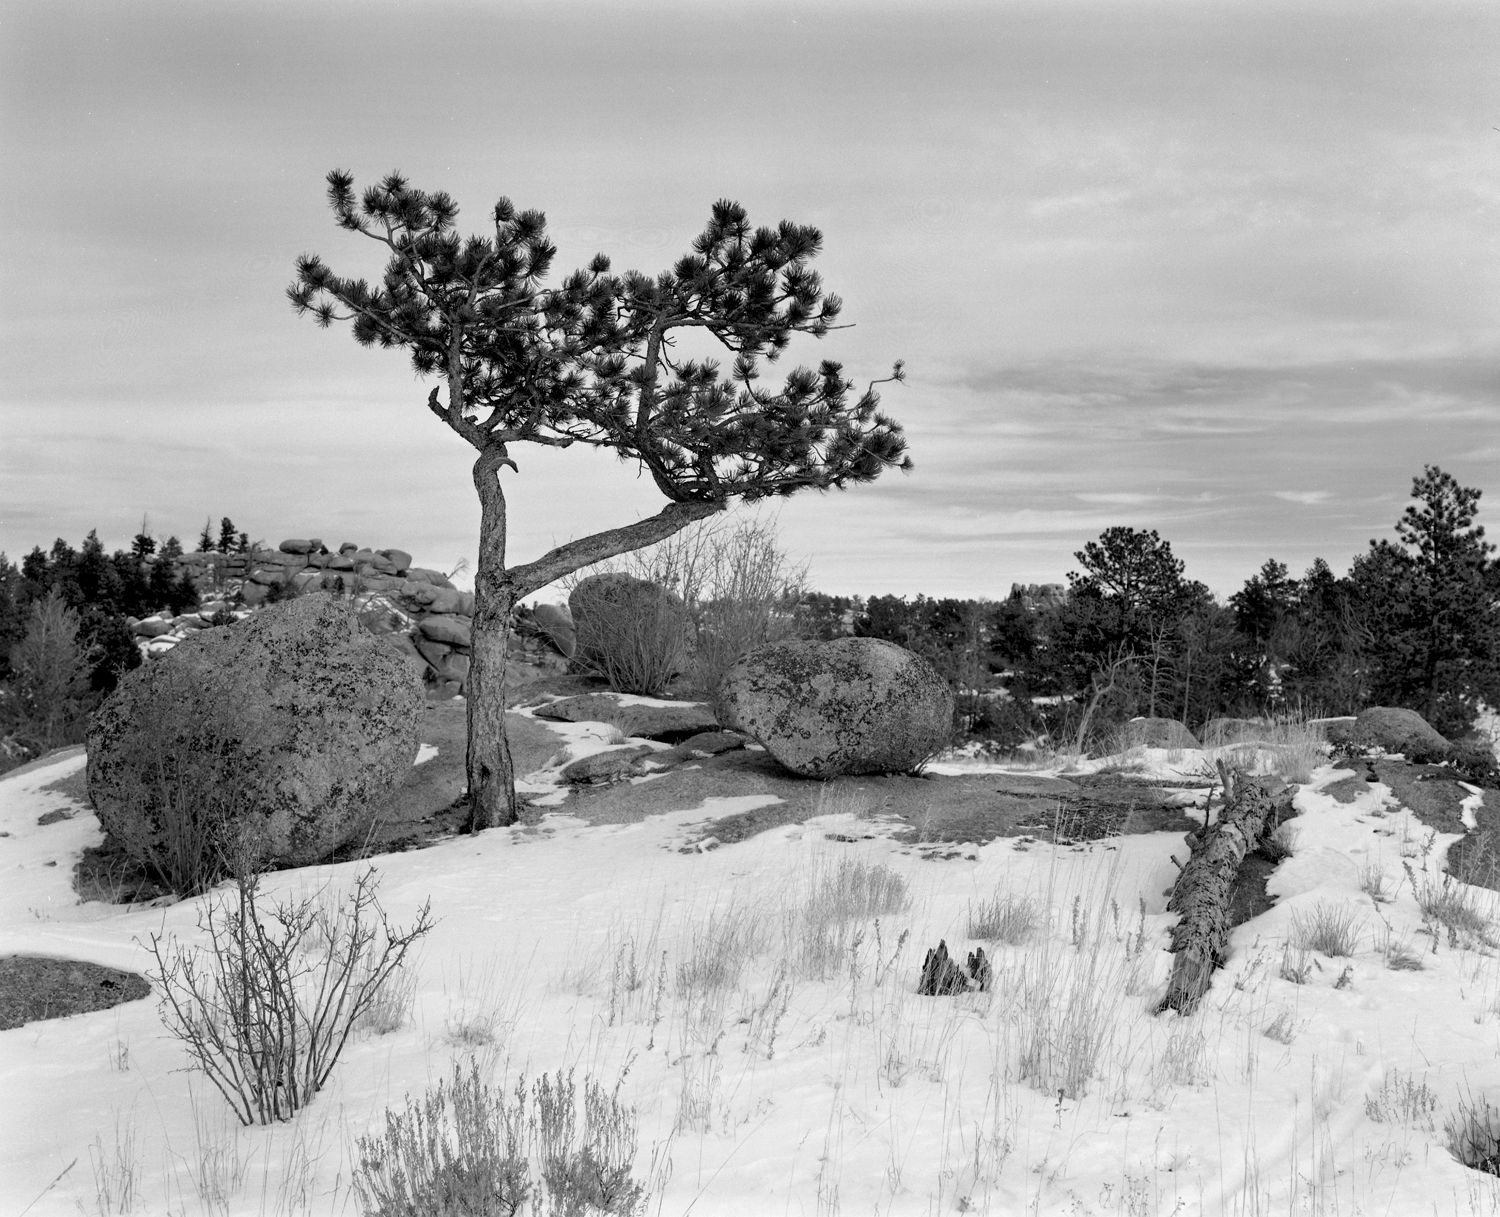
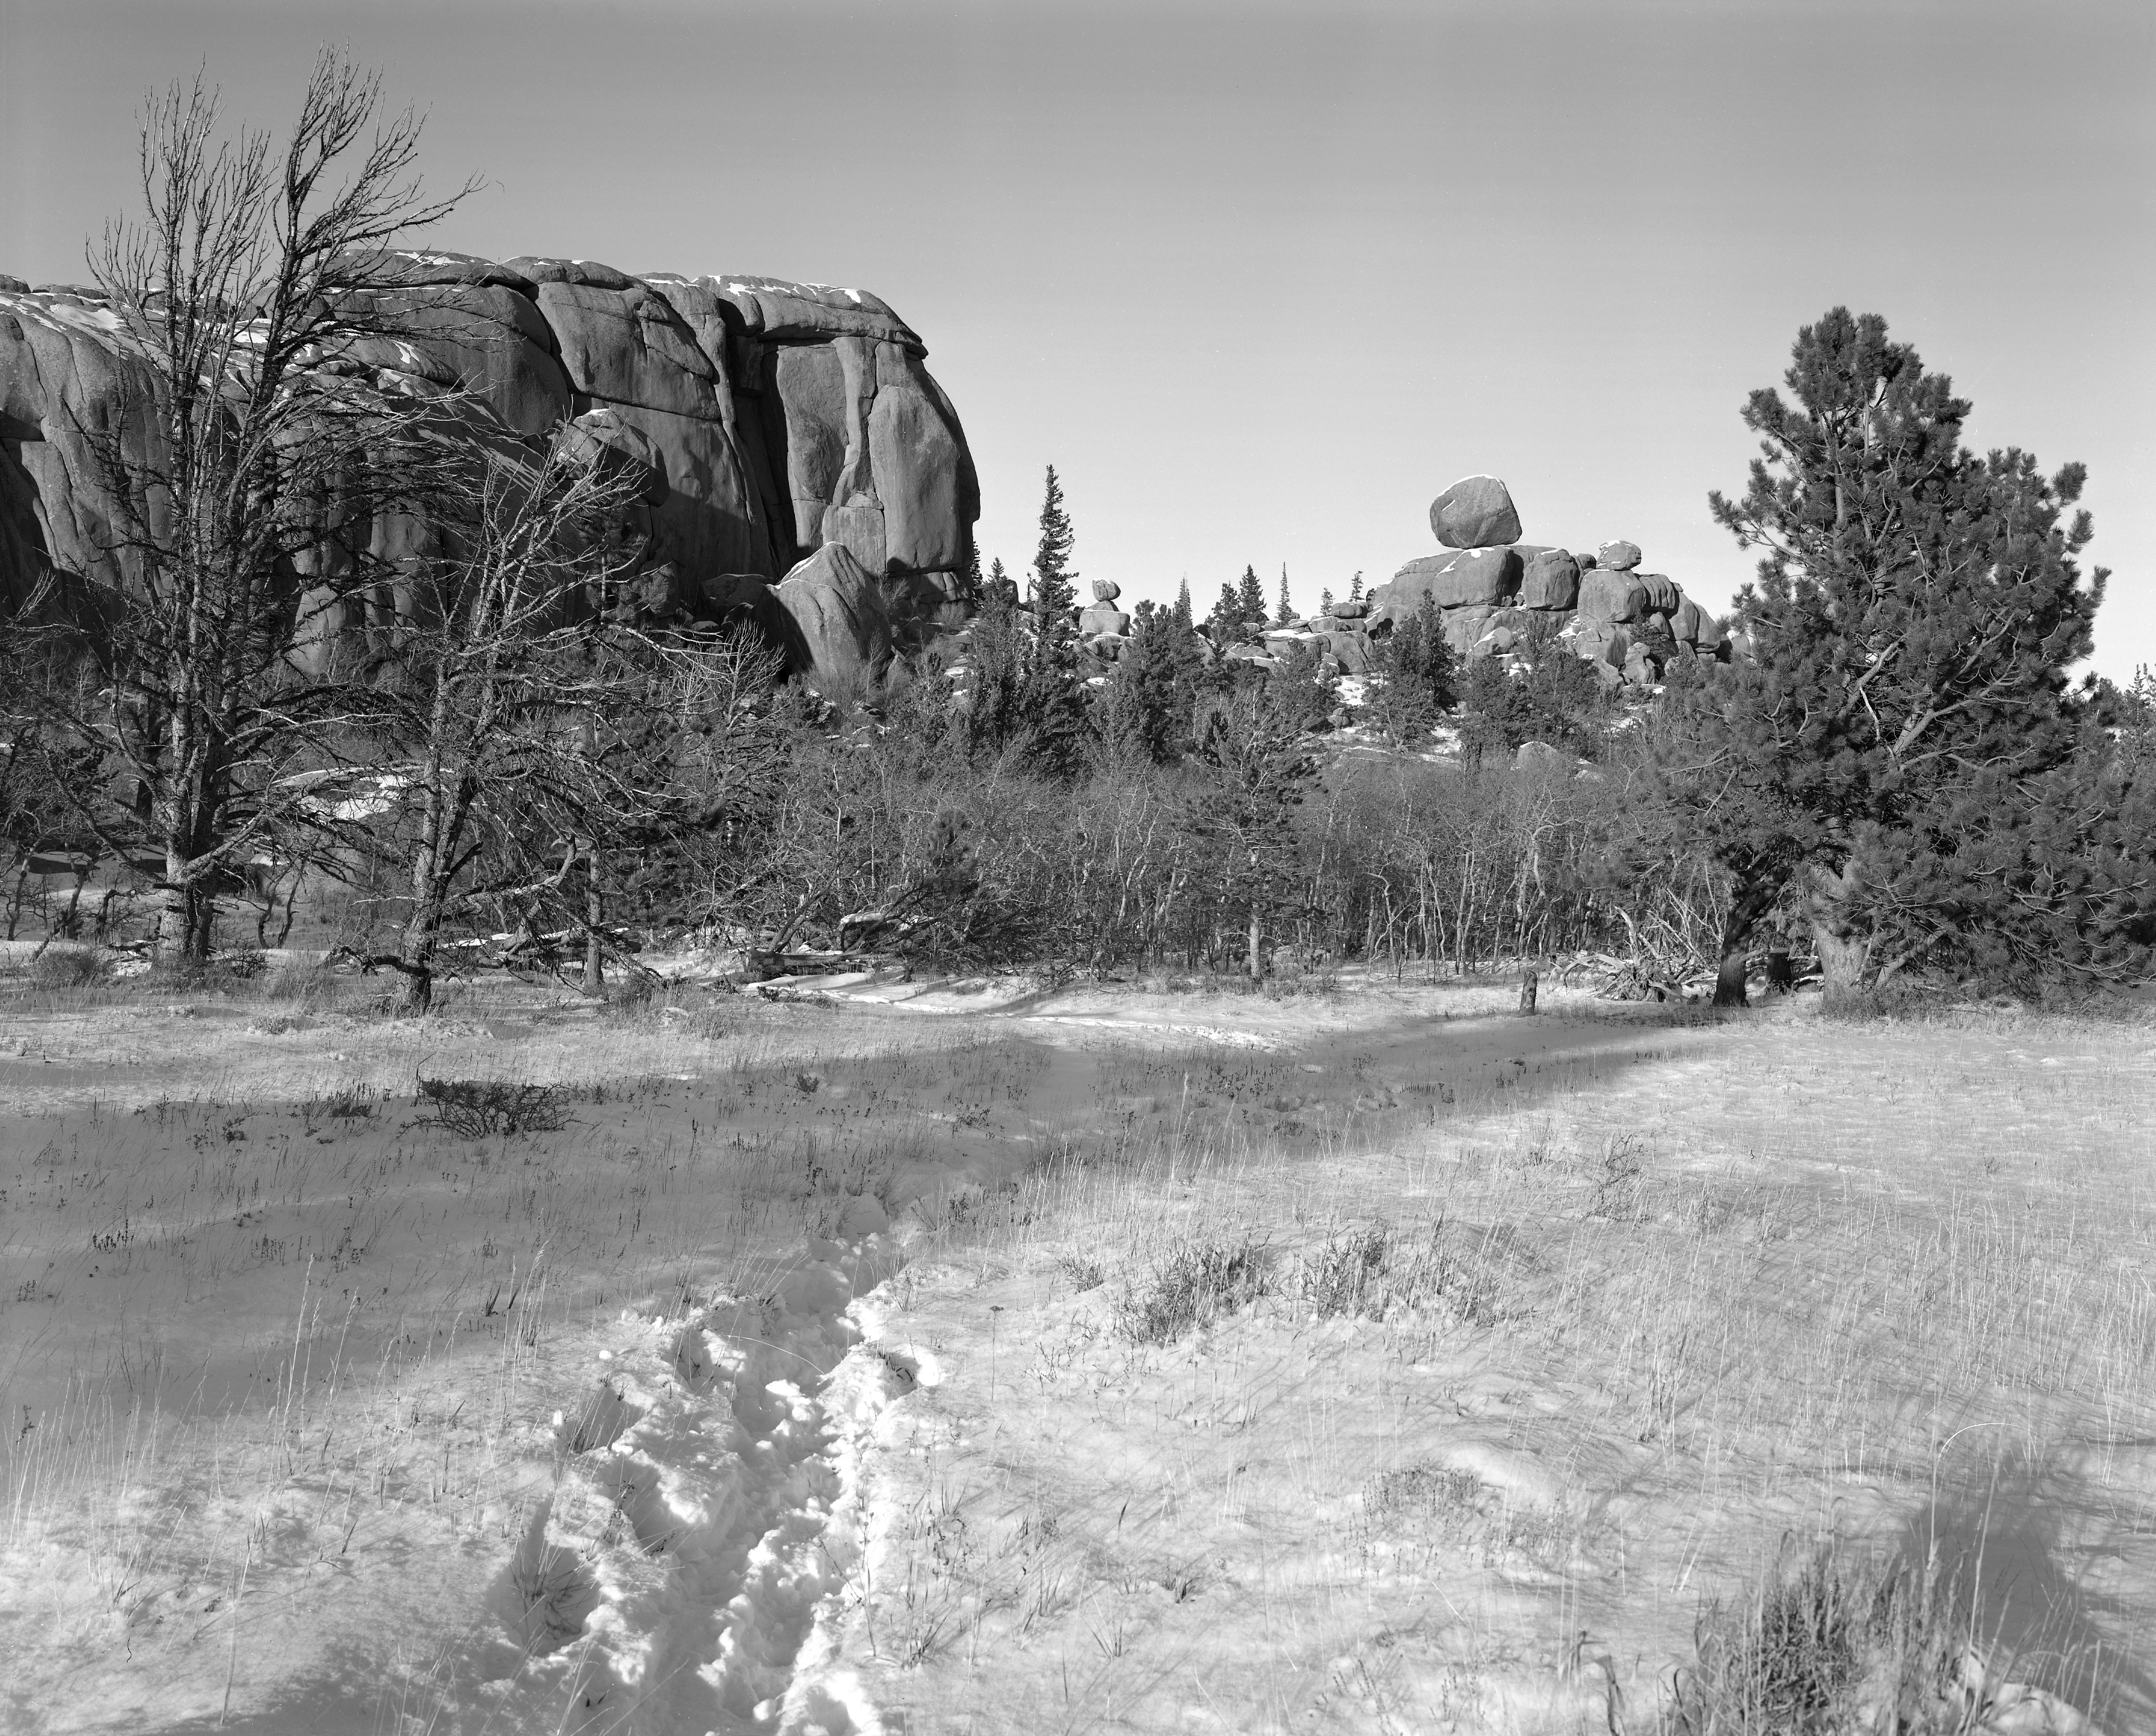
My 2018 Christmas Card Photo; Ilford HP5+ film in the cold and snow. Absolutely no issues with the camera in the adverse weather.
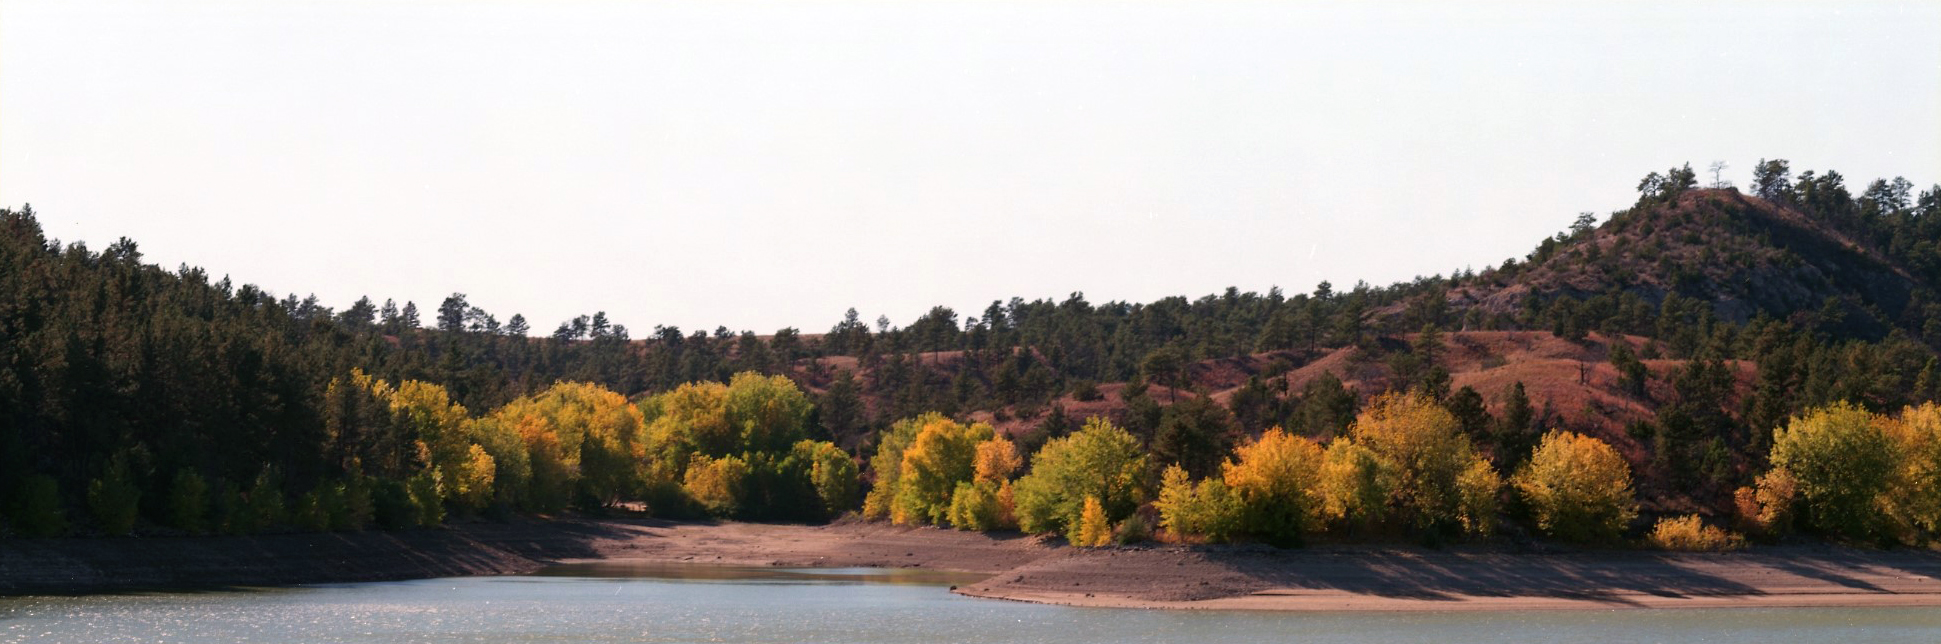
Guernsey Lake, Cottonwoods - DaYi 6x17 Back, Kodak Ektar 25 and 450mm lens
Ilford HP5+ developed in Pyro - 250mm lens and orange filter
To conclude
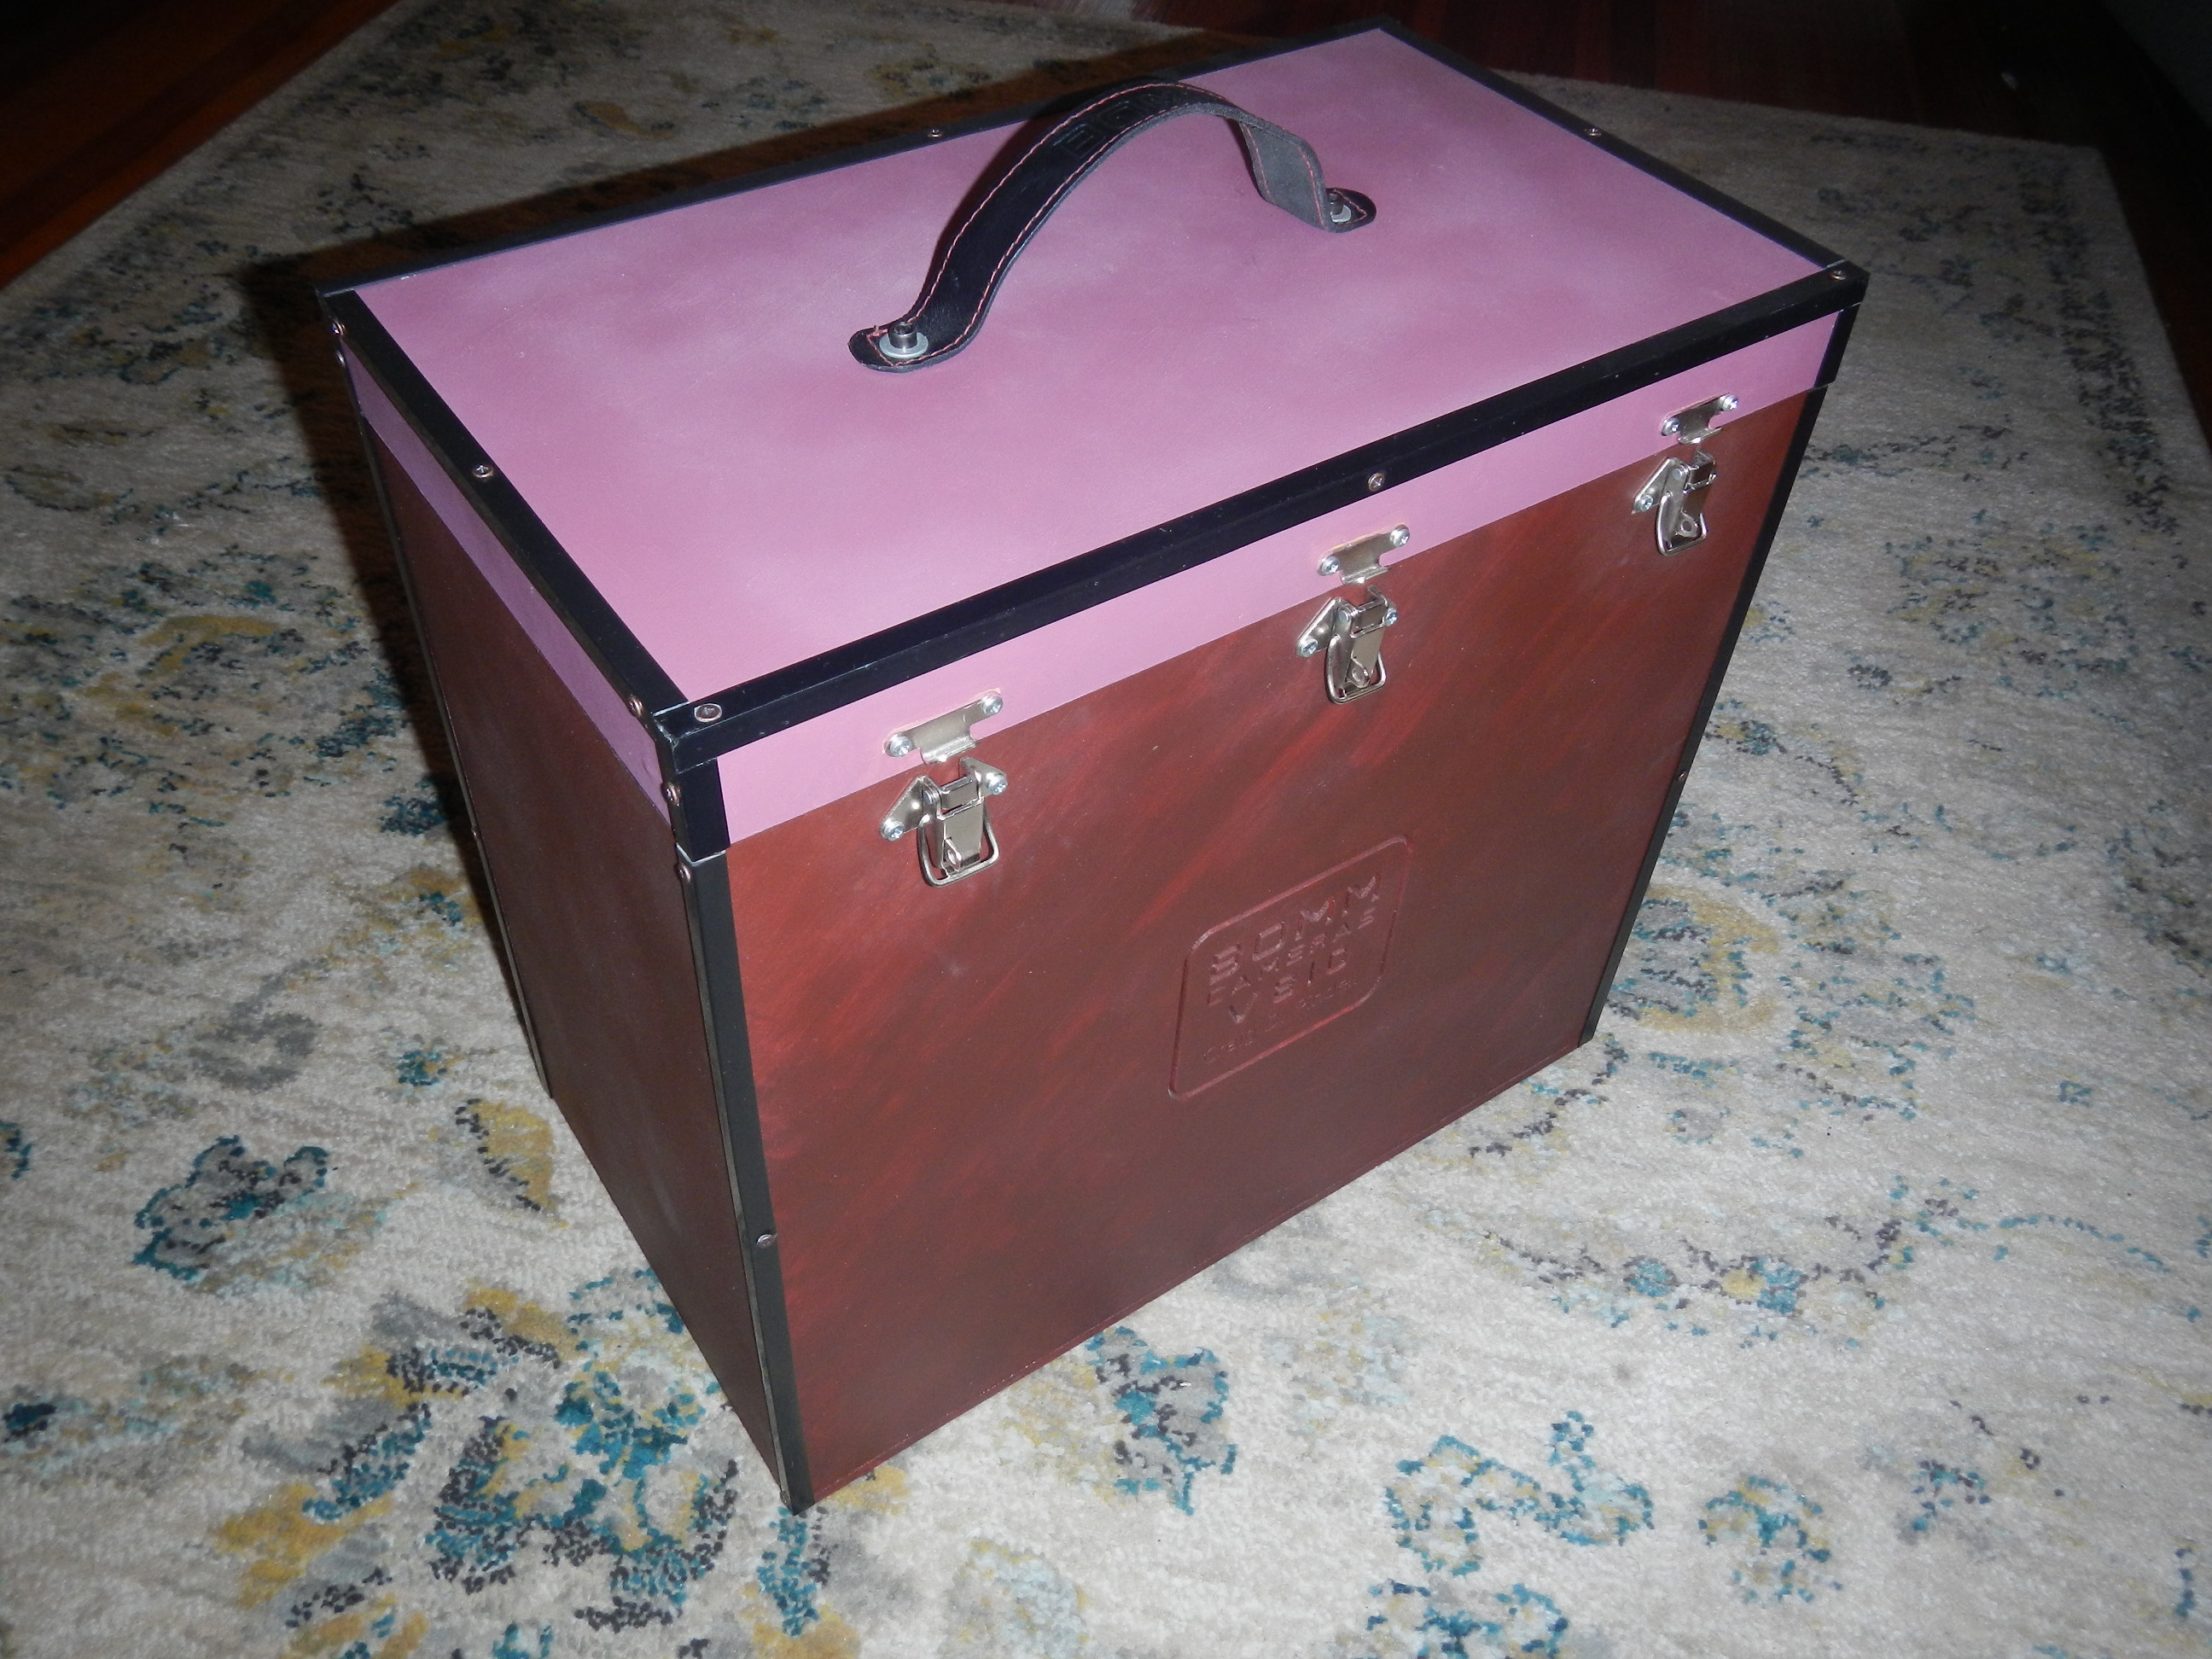
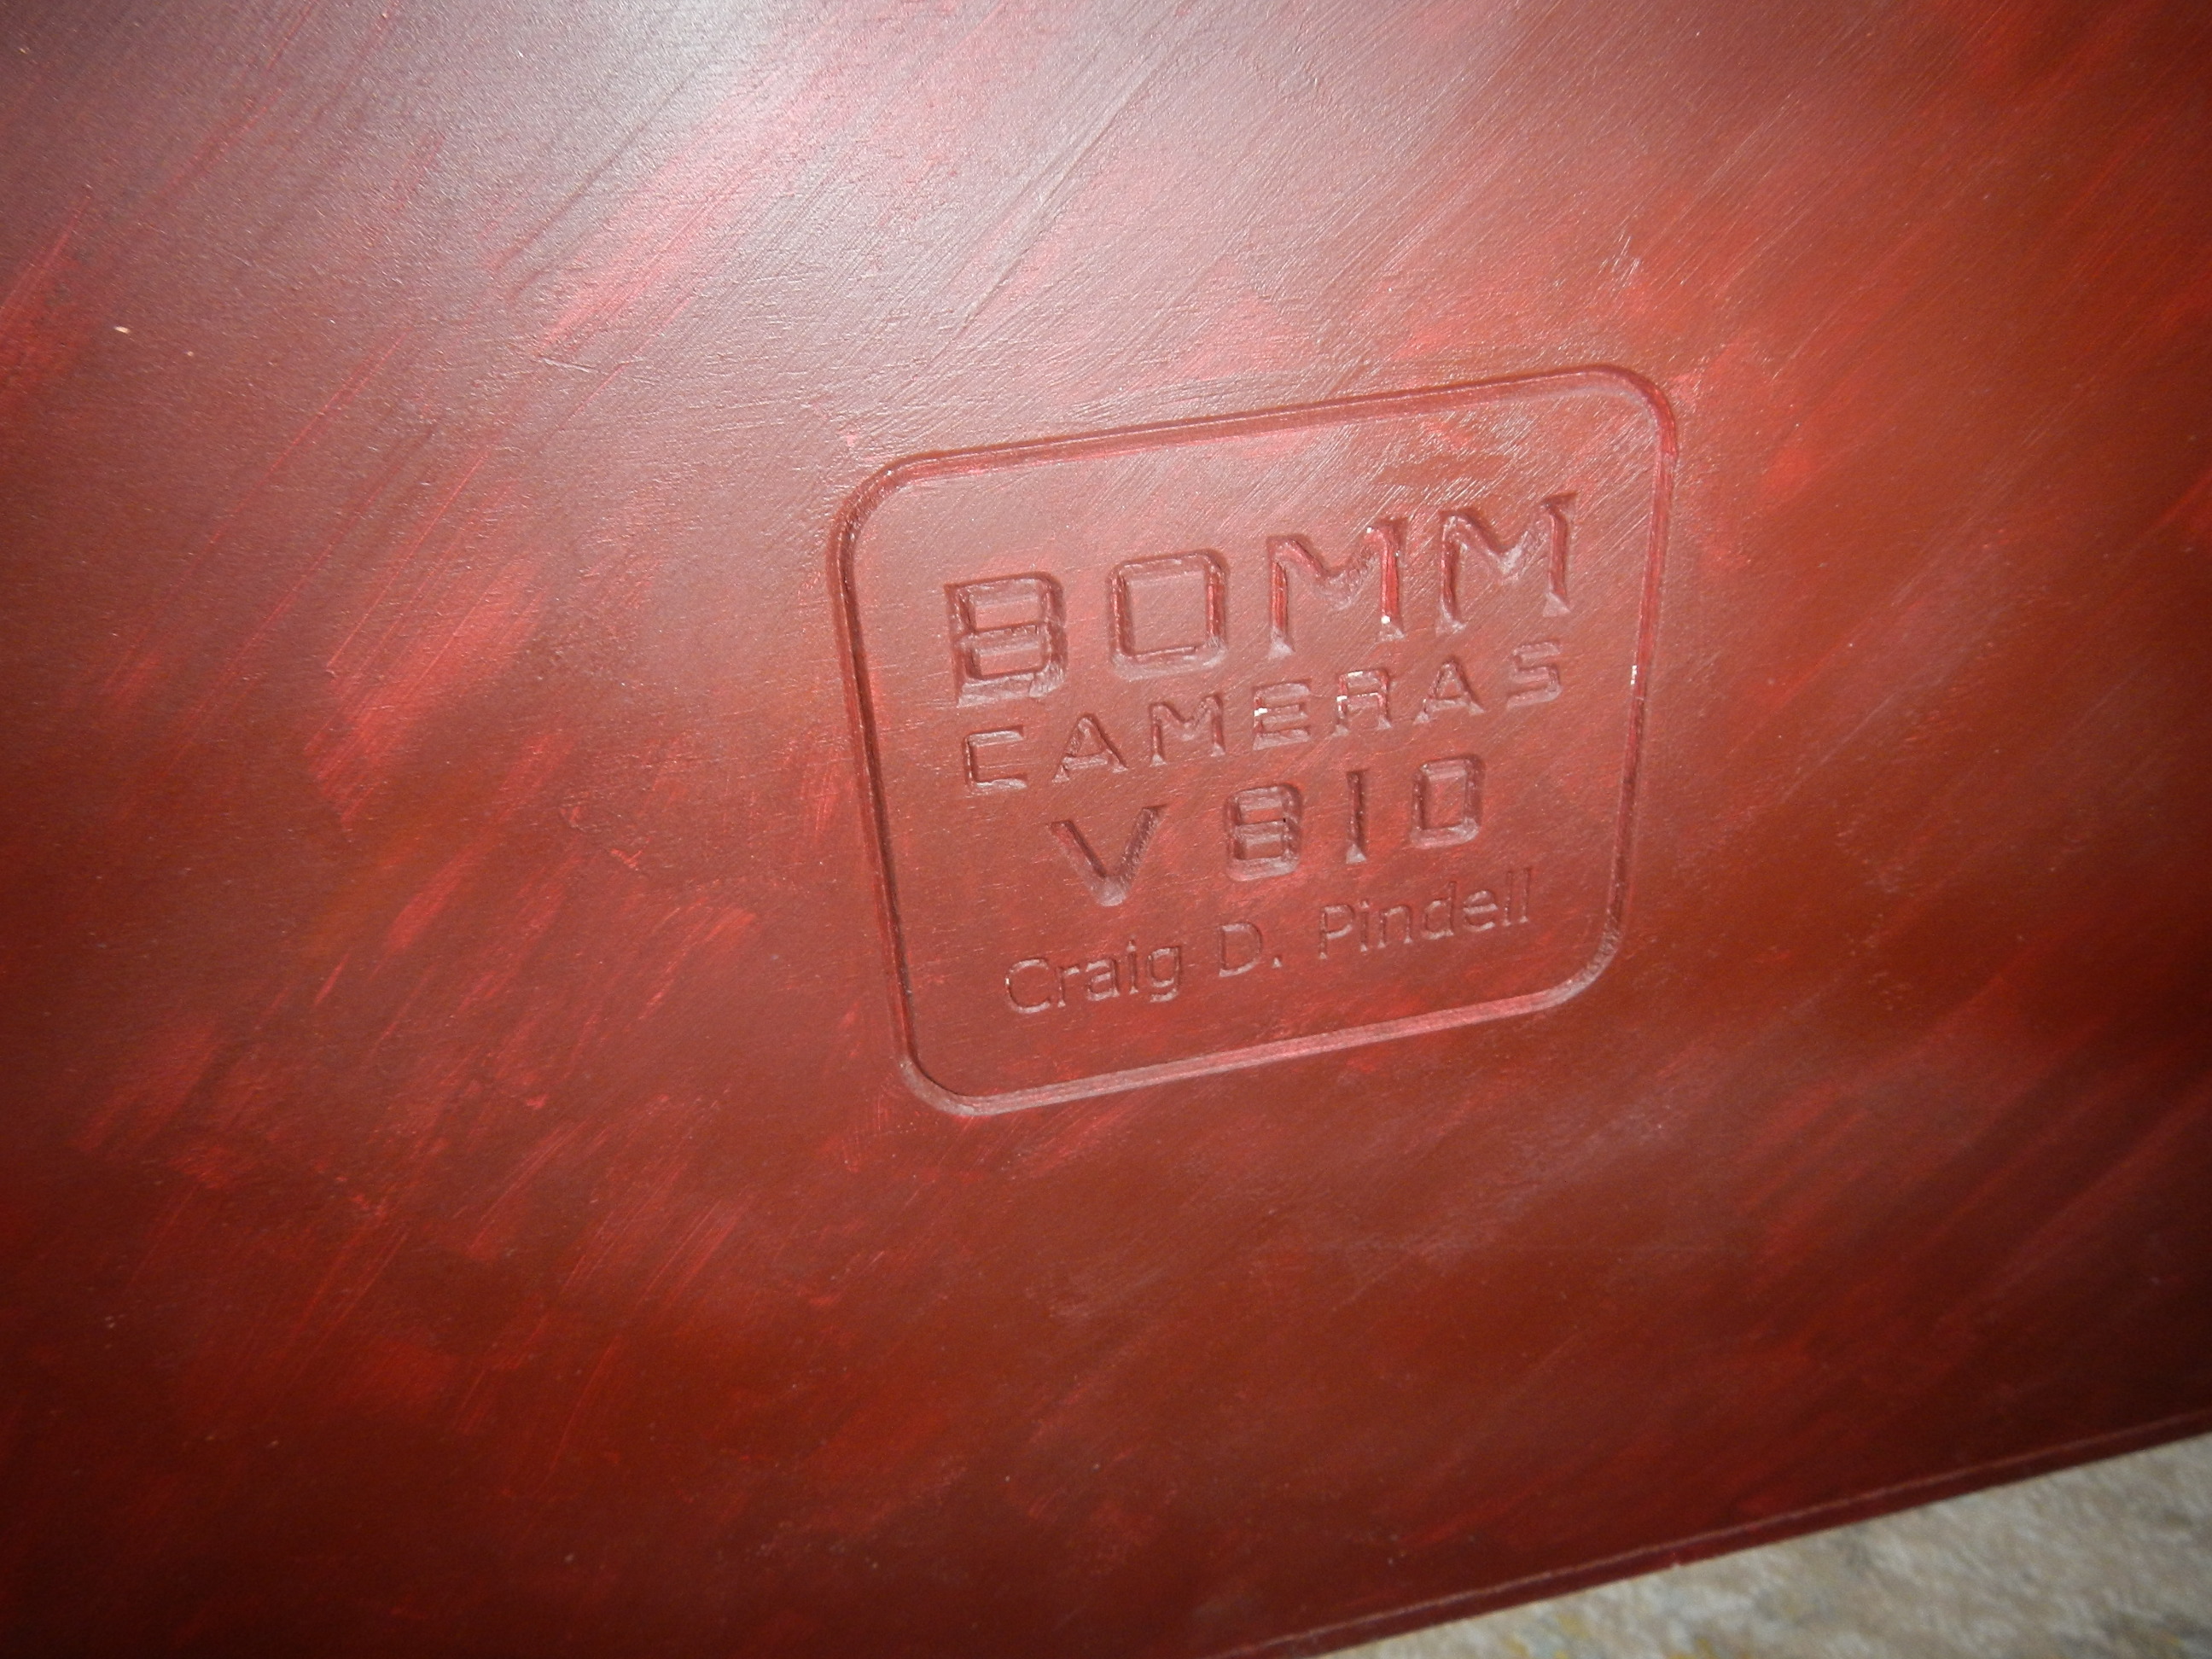
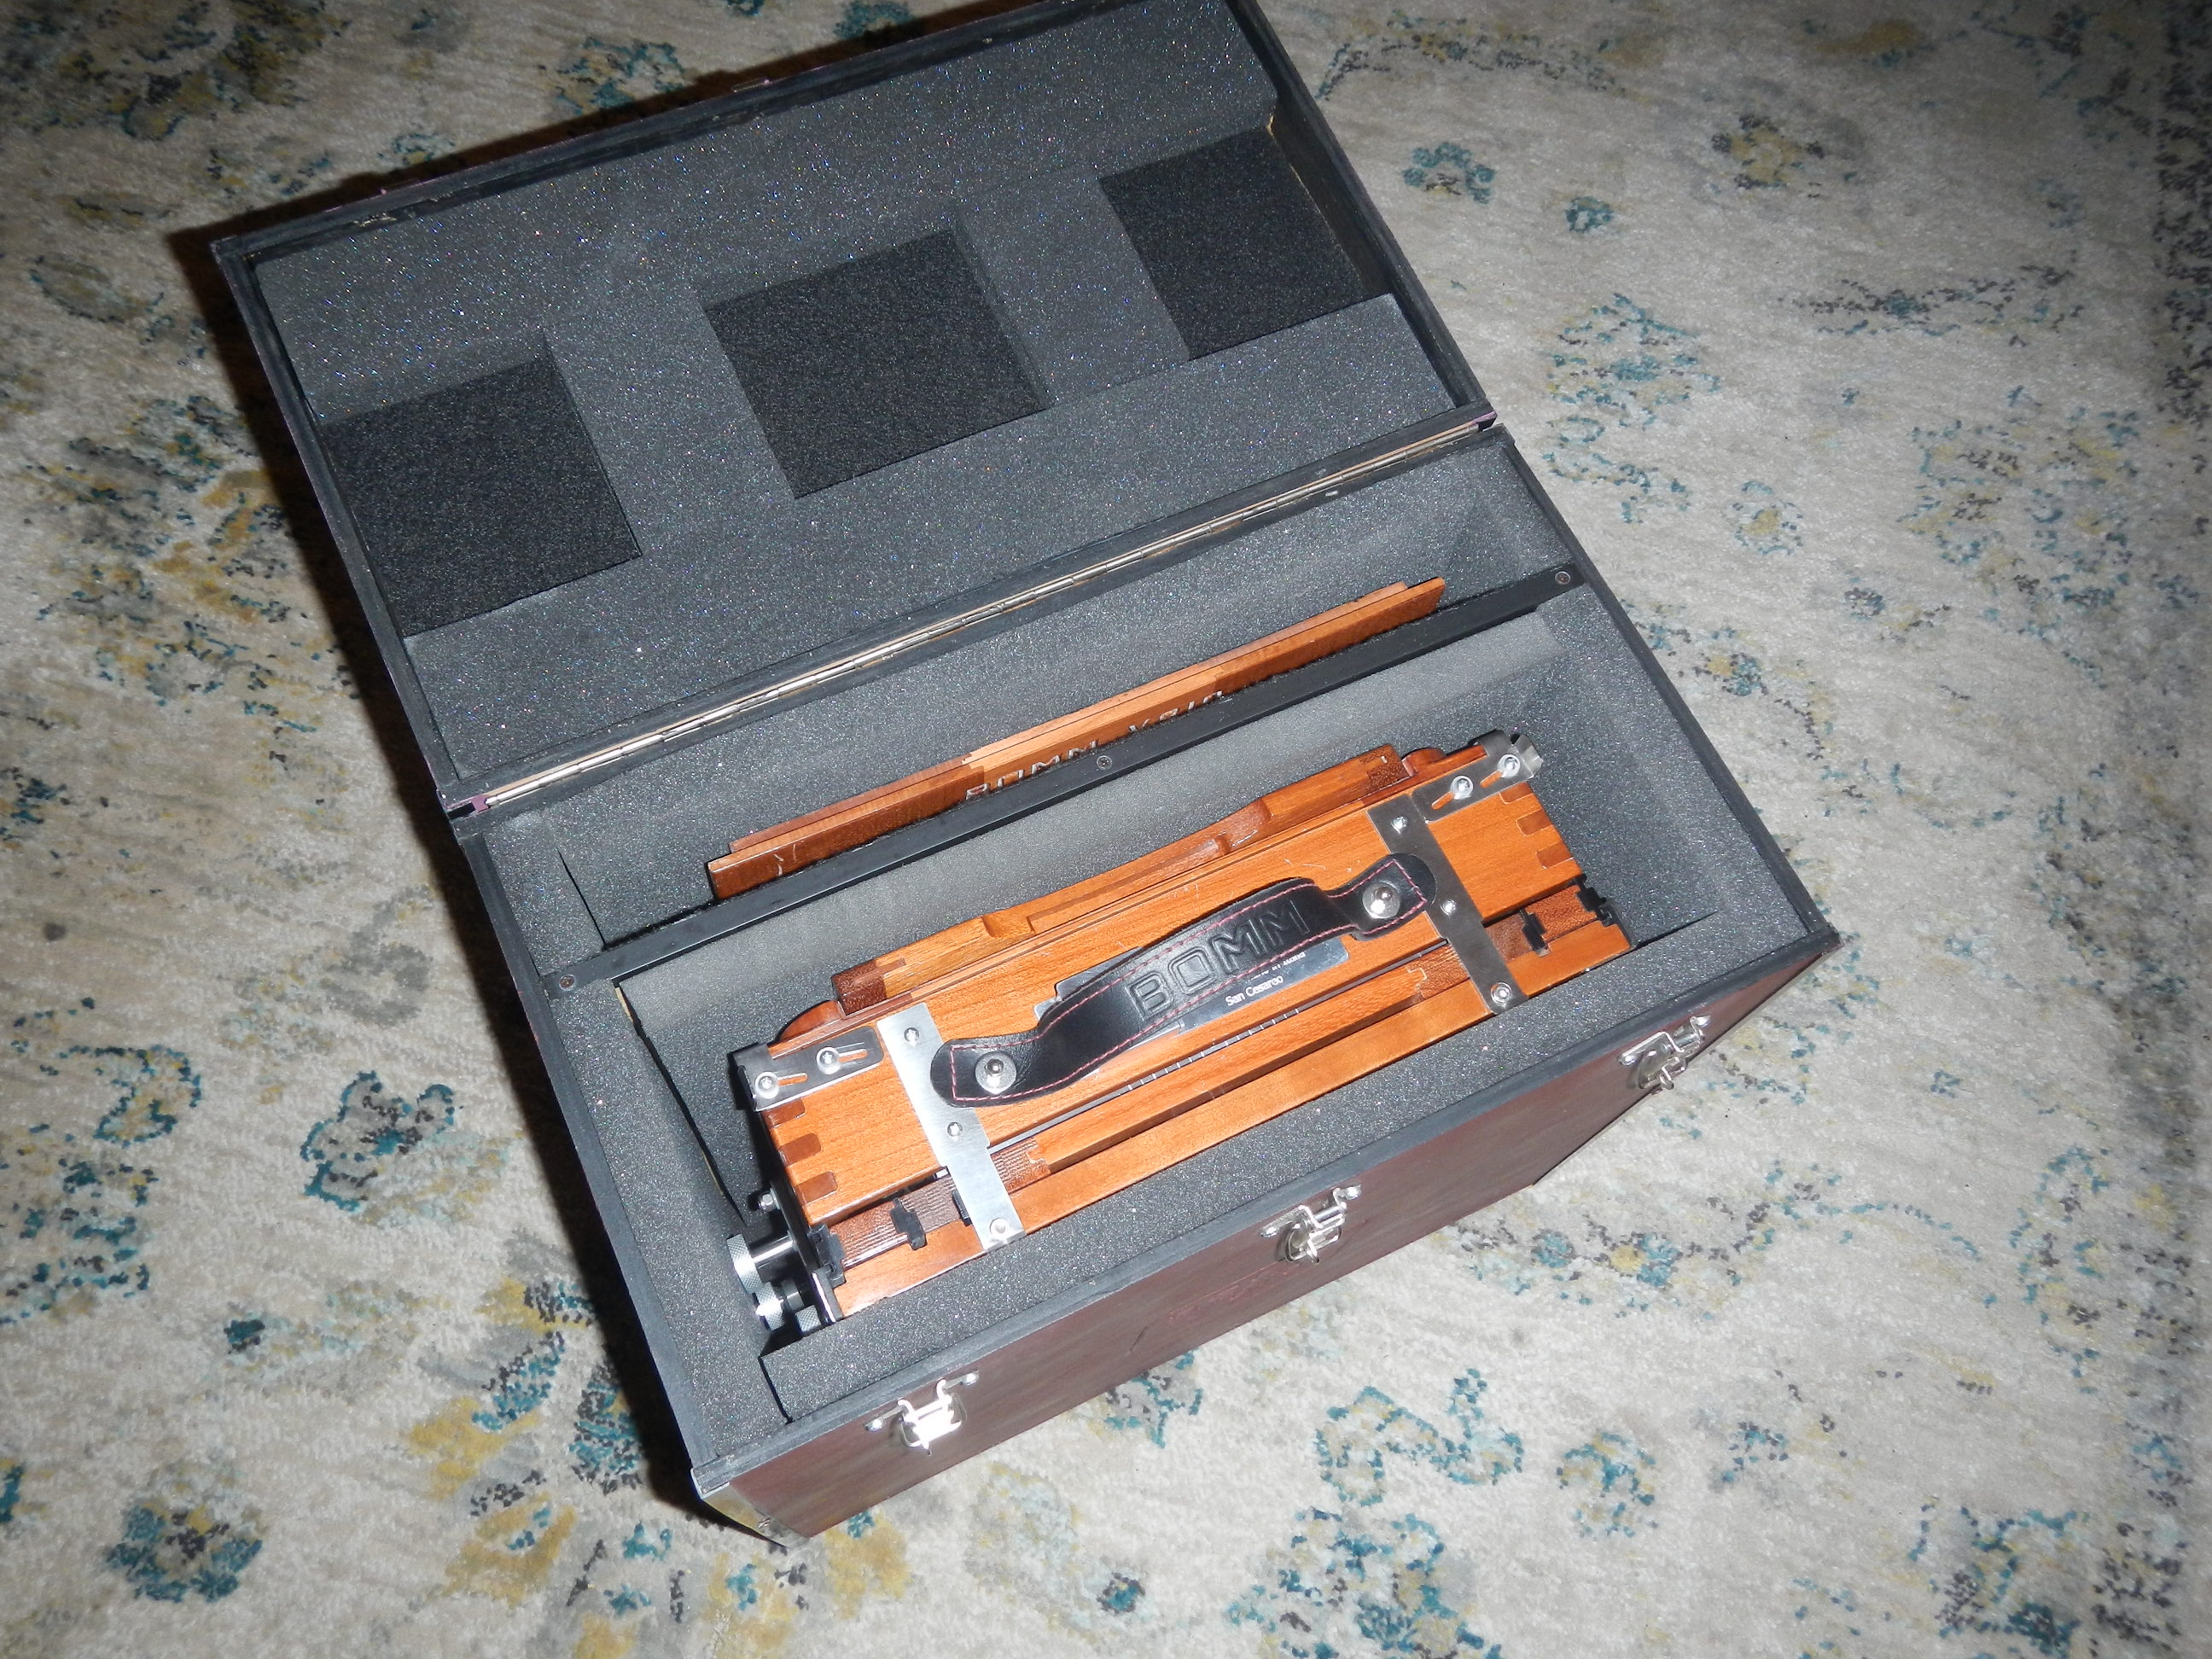
The case that Manuel built for the Bomm is a work of art unto itself. There are padded compartments for the camera and for the reducing back. the camera is personalized for me, including the #BelieveInFilm hashtag and my name on the reducing back. Even the leather straps have red stitching. The attention to detail is incredible, and there is so much detail it takes time to absorb it all. It seems like every time I am using the camera I find something I had not noticed before.
To be honest, I have the most beautiful camera I have ever seen, and an instrument that is very well crafted and intuitive to use. I usually have some sort of buyers remorse when I purchase expensive things. That is not the case with this camera. This is a purchase I would absolutely do again.
I ordered the camera in November (2017) and received the camera in September 2018. There were times that I was frustrated with the wait, but in the end, the incredible engineering and design, and all of the hand crafting involved in making the camera, the wait time was more than reasonable.
Lastly, and probably most importantly, working with Max on this has been
so enjoyable. He is truly a genius, and one of the most talented
craftsman I have ever encountered. For him, there is nothing that is
impossible, only challenges looking for solutions. I know this camera
will outlast me by a long time and will be a tribute to Max for years
and years to come.
The journey from conception to completion has been a blast!